On Labstep, some actions can be restricted based on Roles and Permissions. Within an organisation, you can either be an Admin or a Member. In a workspace, you can have either of the following permissions: owner, editor, viewer or custom permissions (paid tiers only).
Workspace permissions only apply to workspaces. When you create a workspace, you will automatically become the workspace "Owner". Check out this article to learn how to set up a workspace. There are three basic levels of permissions within a workspace: Owner, Editor, and Viewer.
As the "Owner", you have → absolute authority over this specific workspace. You can, for example, invite/disinvite/remove other members. You can also edit, share, unlock, and delete any content within this workspace. You can also transfer ownership of content to different workspaces.
As an "Editor", you can → create and edit any content within the workspace.
As a "Viewer", you can ONLY → print/assign/view content and manage your Notification Settings.
If you are an Academic Plus, Pro, or Enterprise user, you have an additional level that corresponds to Custom Roles, where you can tailor permissions for different types of users within your organisation.
Please note: Your workspace-level permissions are set per workspace, so you might not have the same permissions in different workspaces!
As an Owner (Workspace)
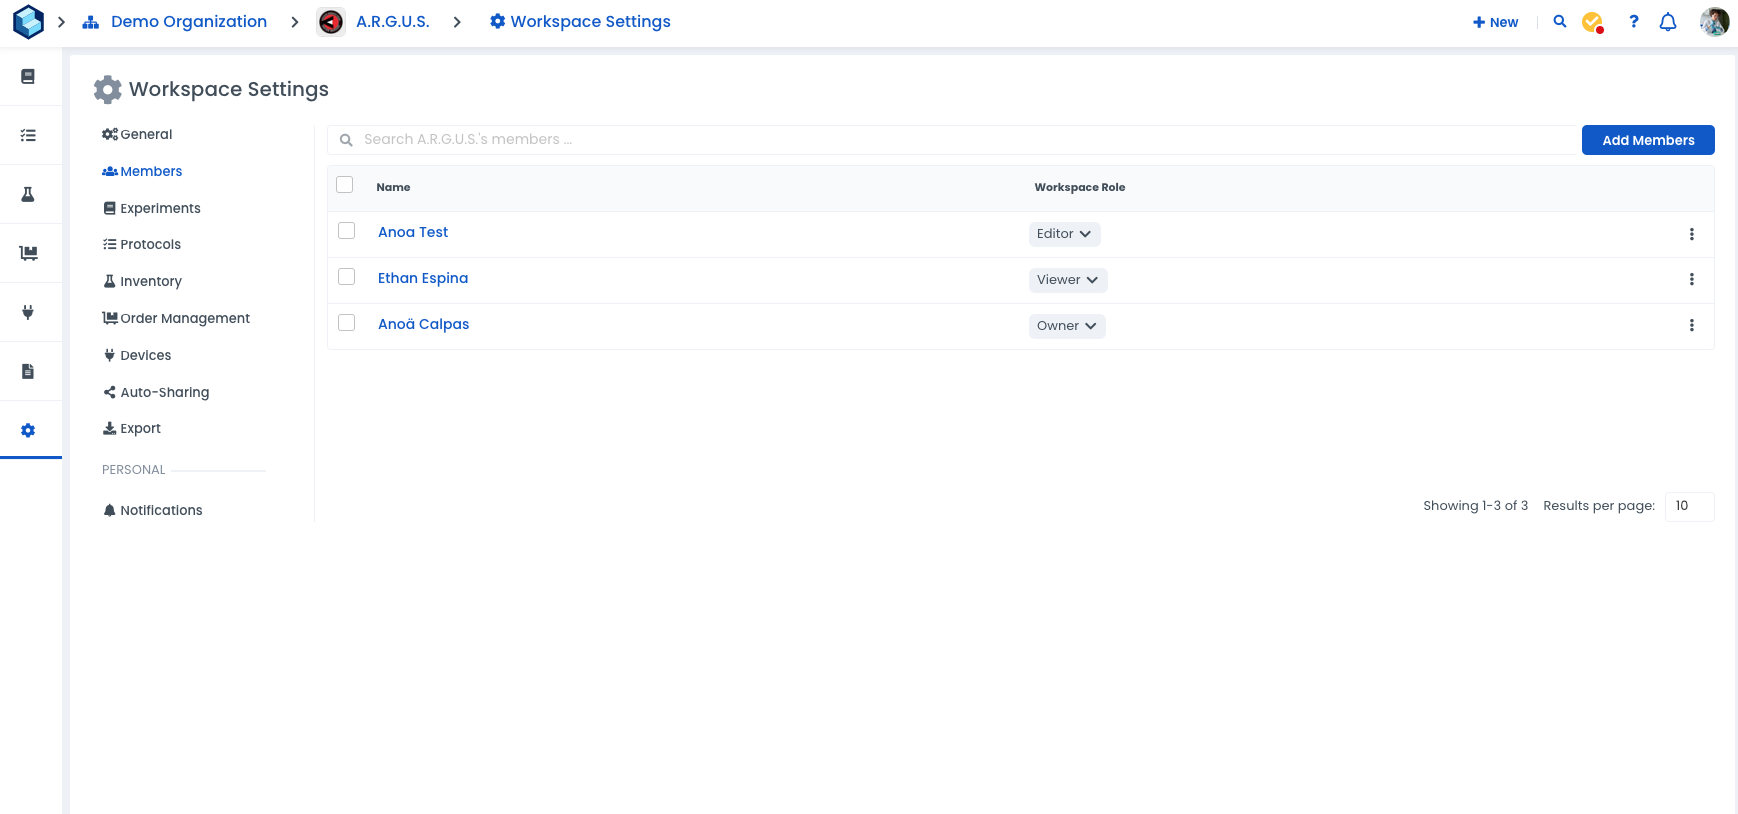
From the workspace overview, click on the gear icon next to your icon and next to "Members."
Select the permission of your choice next to the member's name.
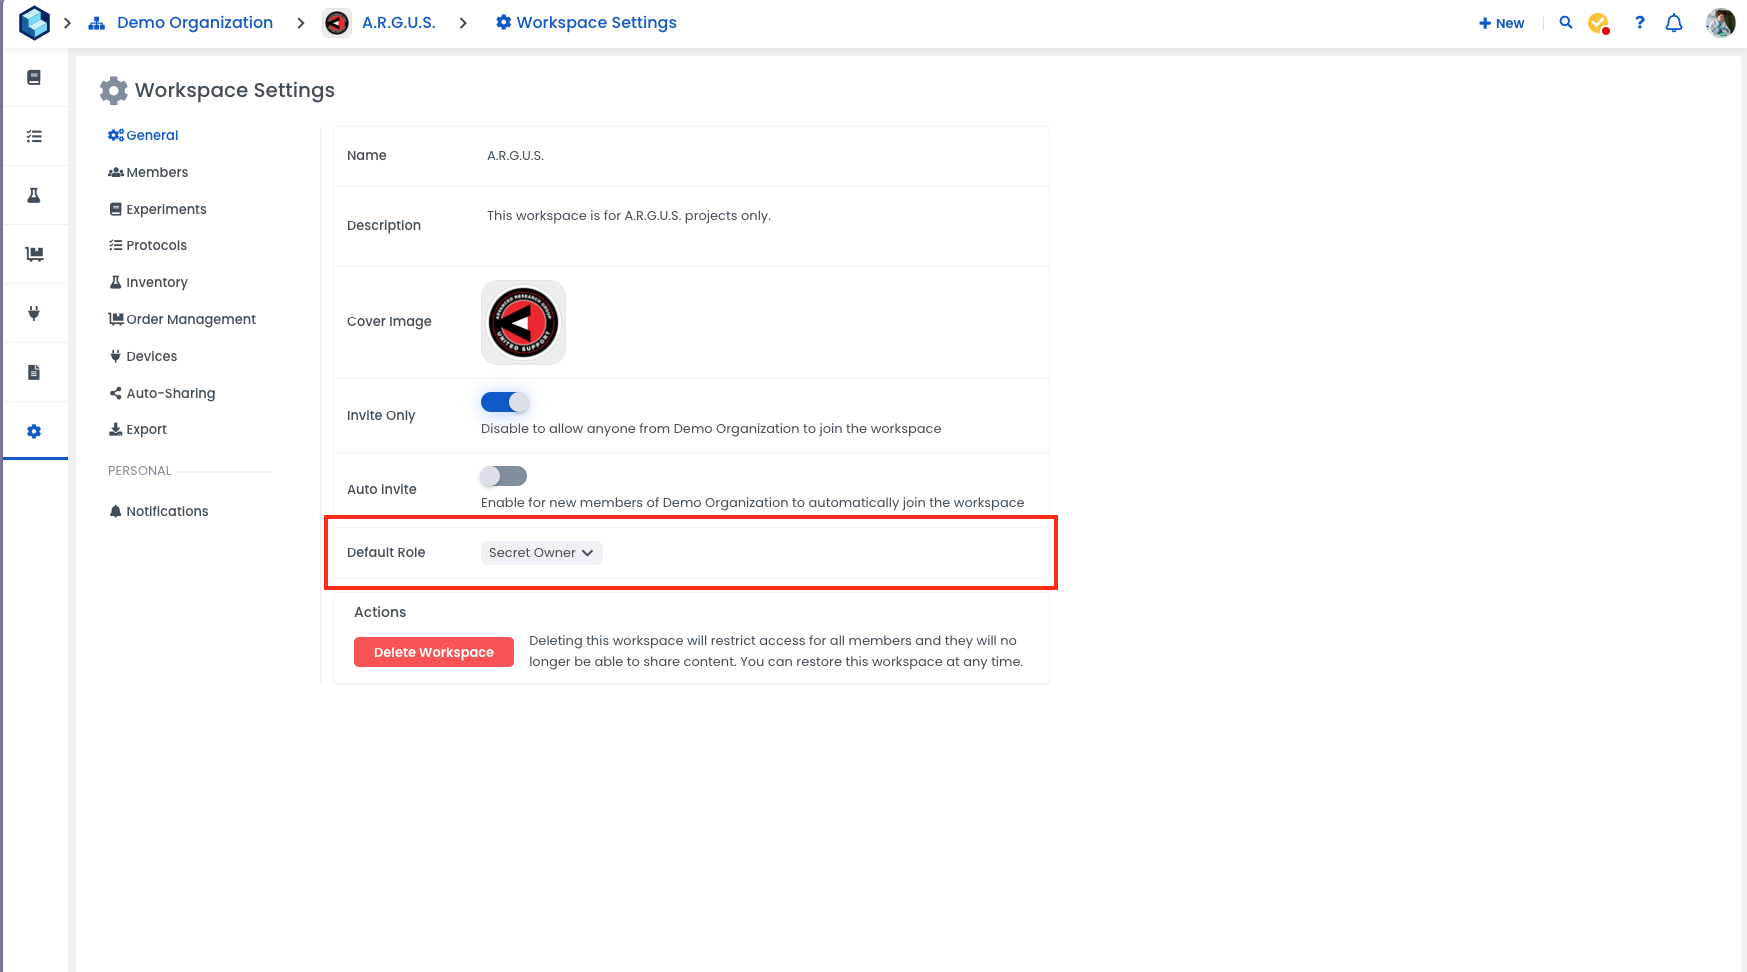
Labstep team tip: As a workspace owner, you can set the default role to "Editor" or "Viewer". Whenever a new member is added to your workspace, they will automatically have this role without you having to select it manually.
As an Admin (Only available for Labstep Academic Plus, Pro and Enterprise users)
Click on your organisation's name at the top left-hand corner of your screen
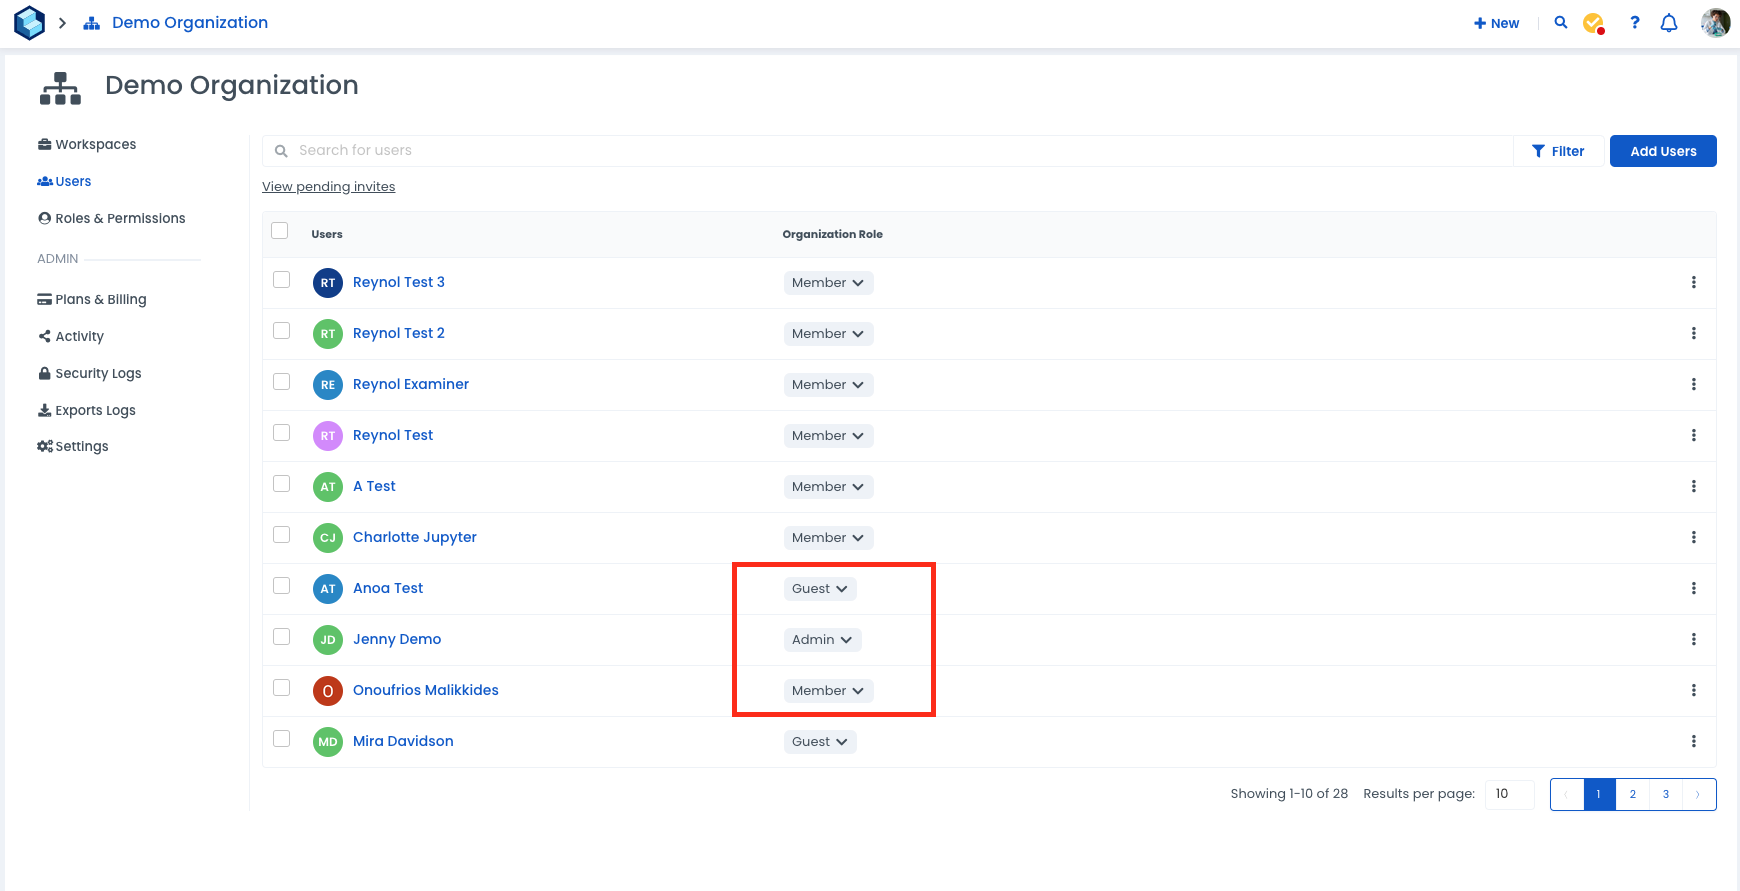
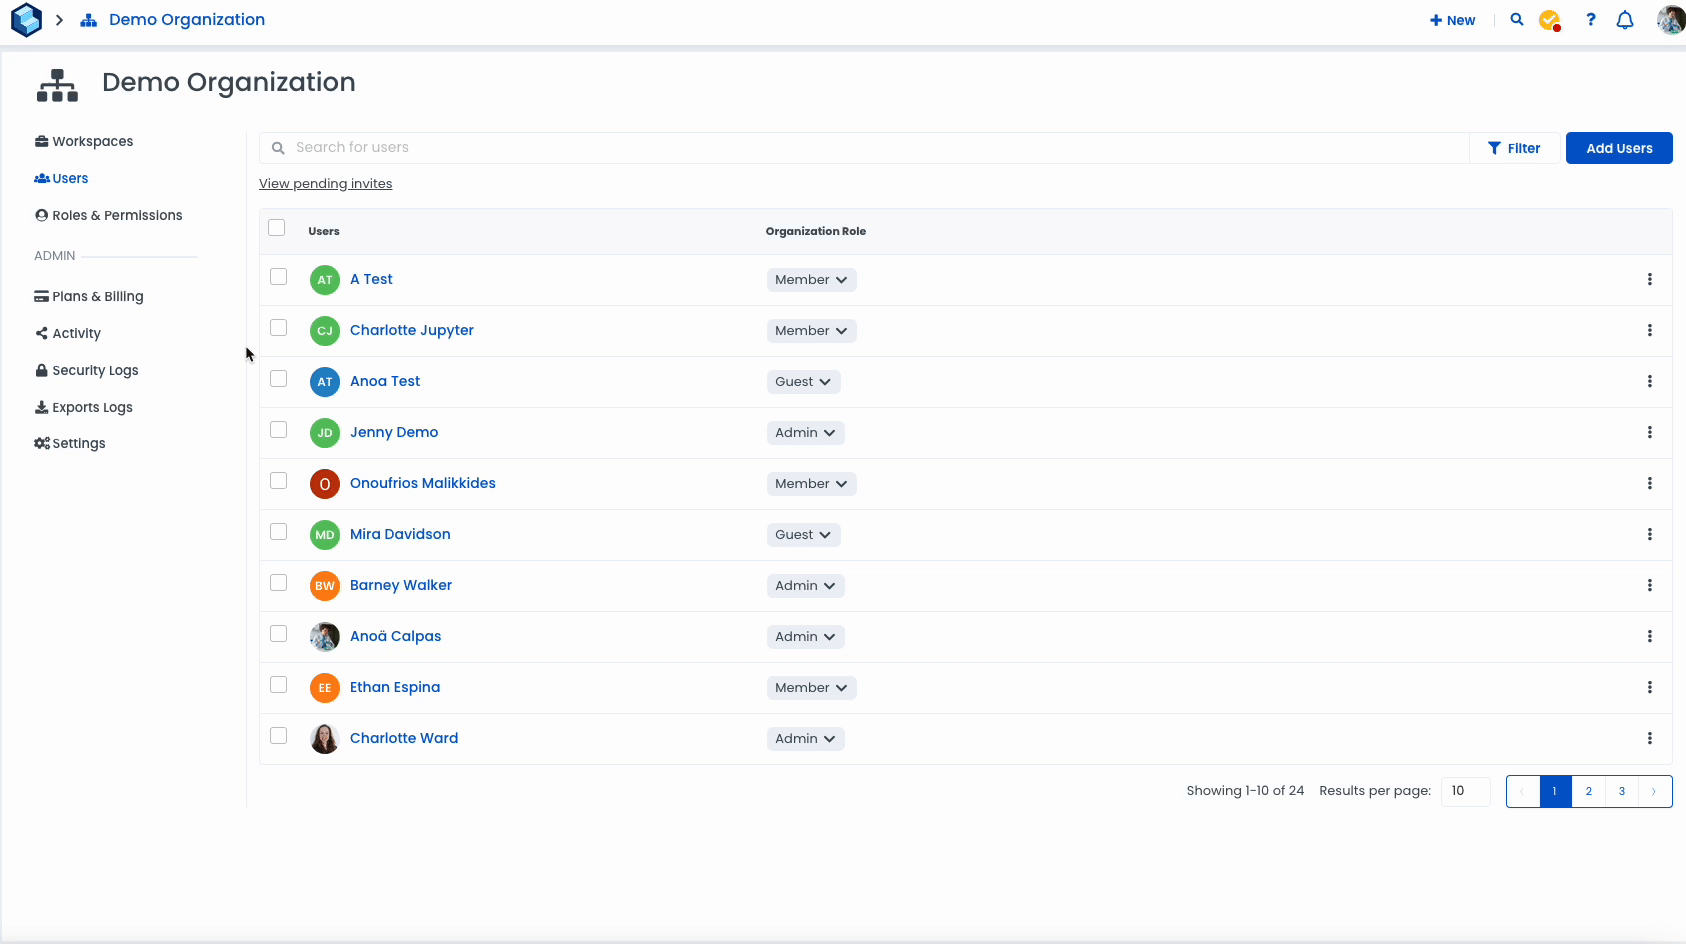
Navigate to "Users".
Click on the vertical ellipsis ⋮ next to a user's name and role.
Click on "Manage Permissions".
Change the user's permissions in the workspace of your choice.
Labstep team tip: You can access your Organisation's page from any workspace by clicking on its name at the top left-hand corner of your screen. Under the Users tab, you will see the list of users within your organisation alongside their user roles, including yours.
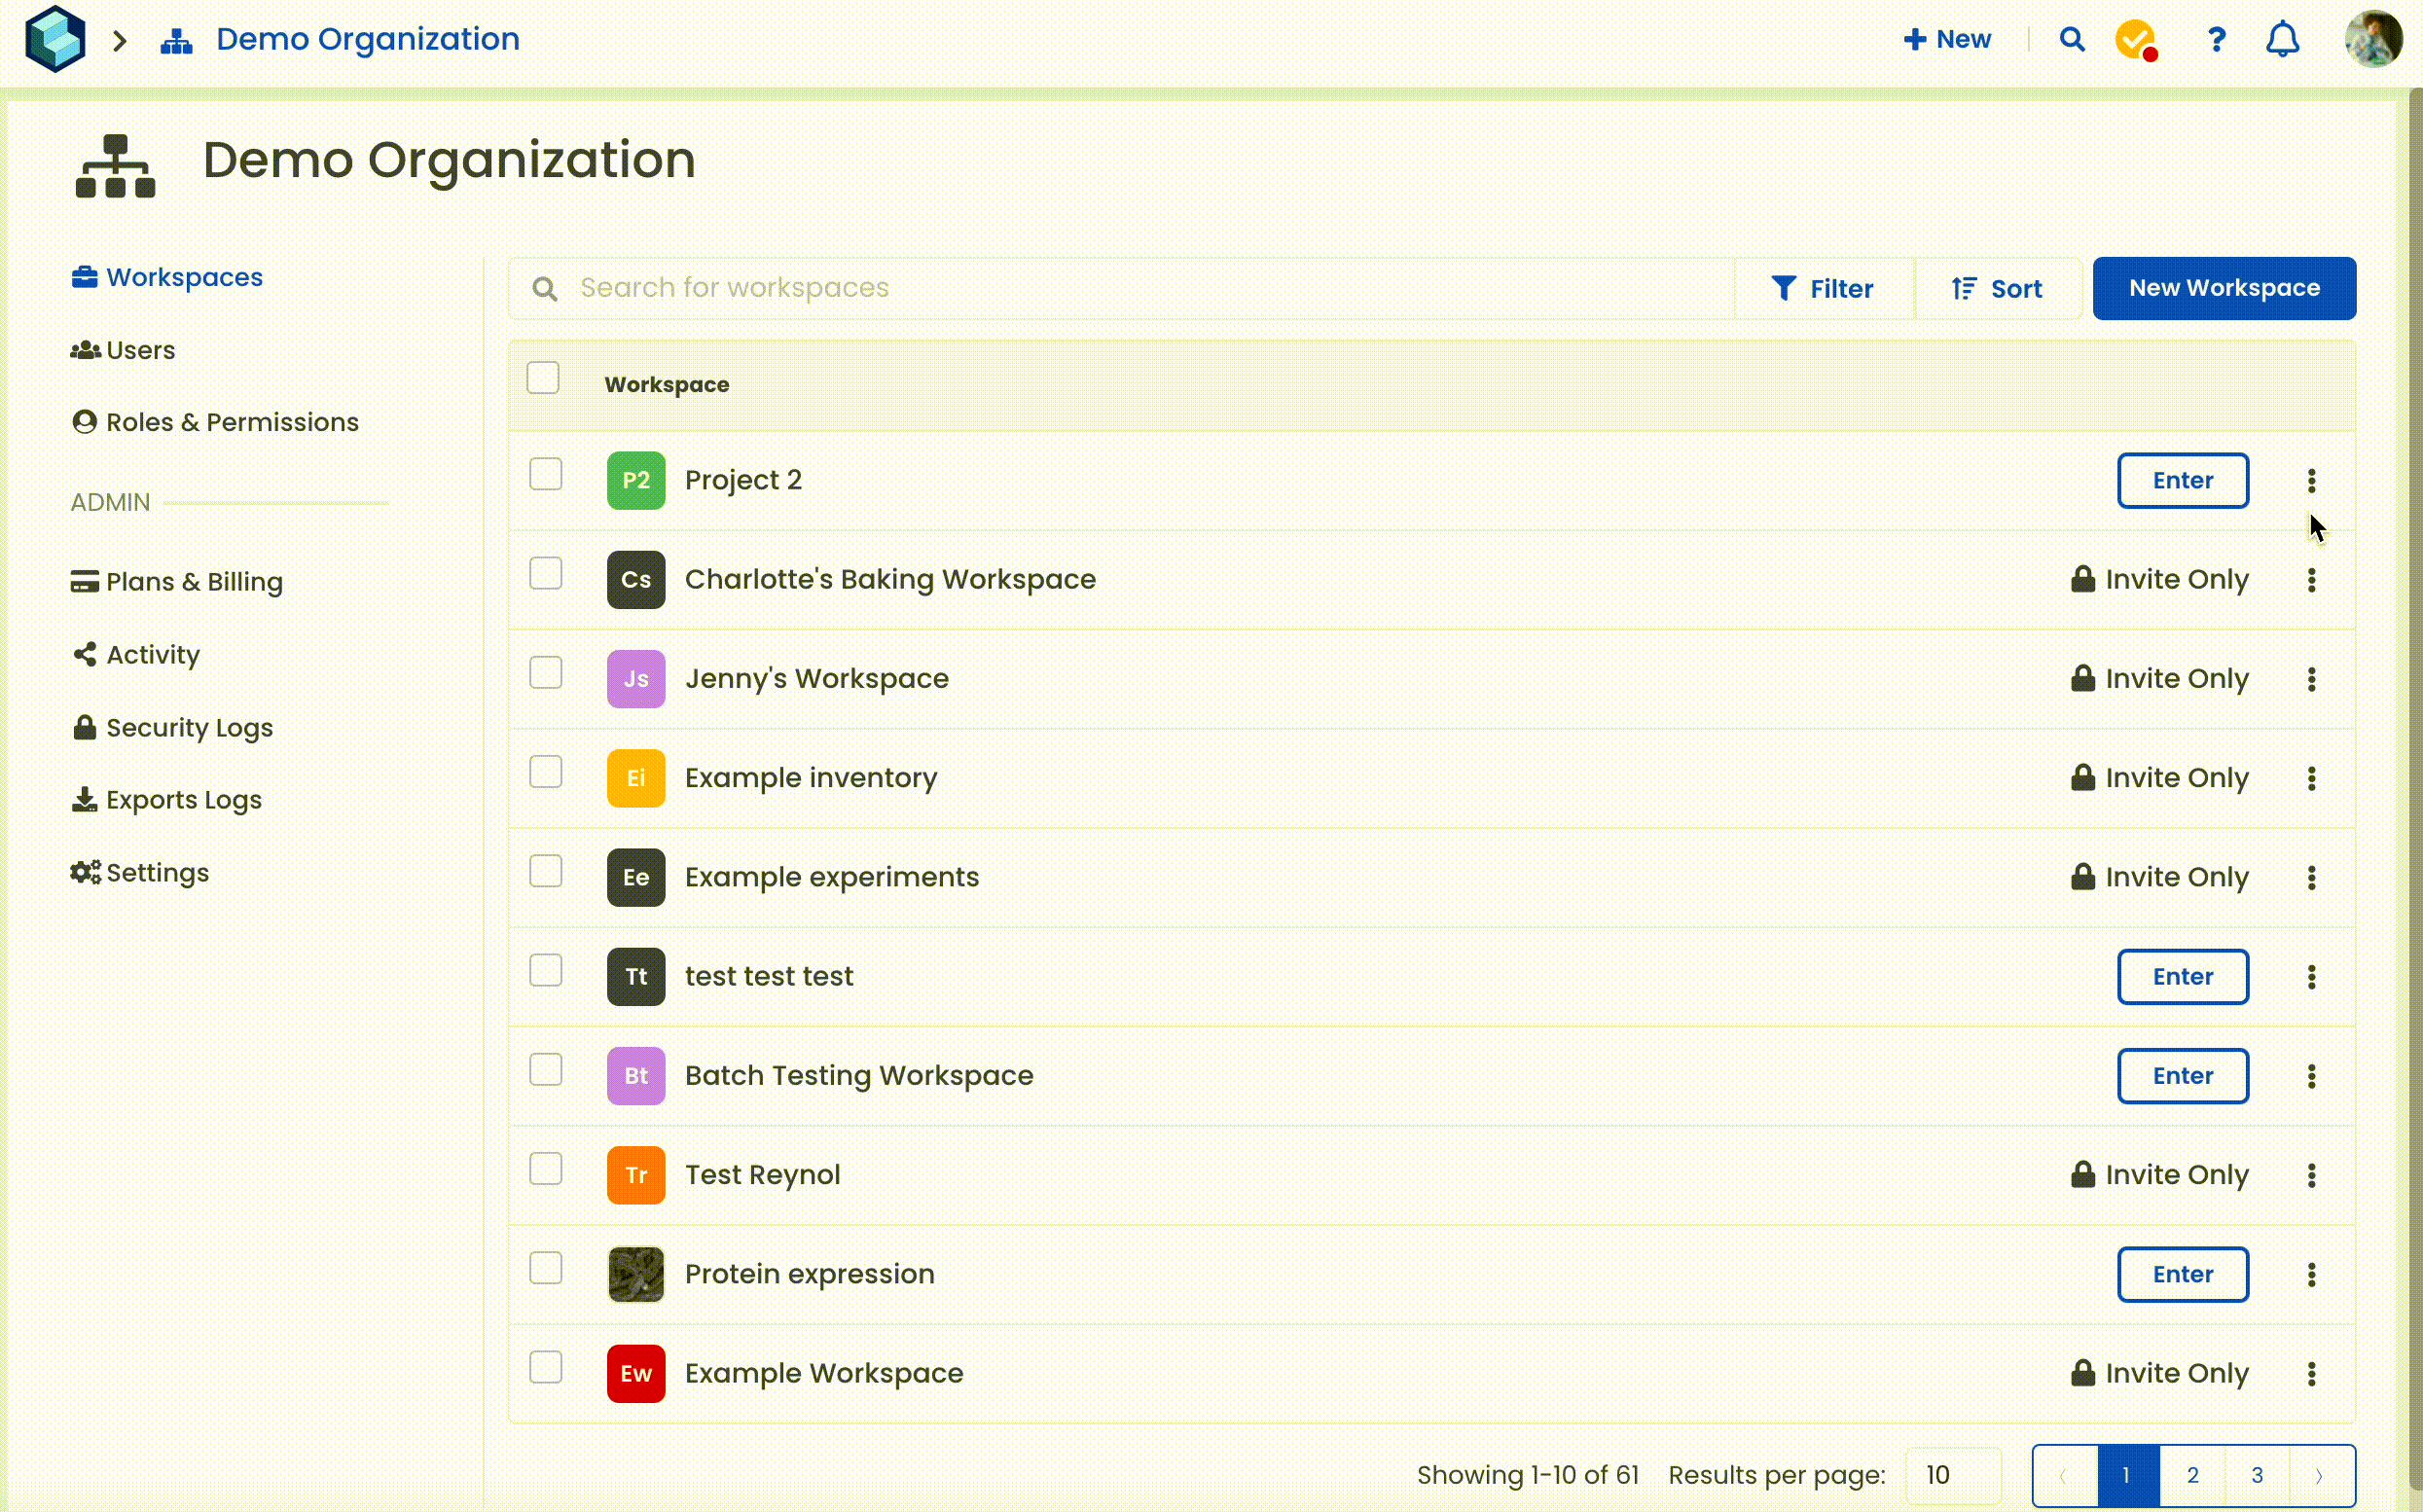
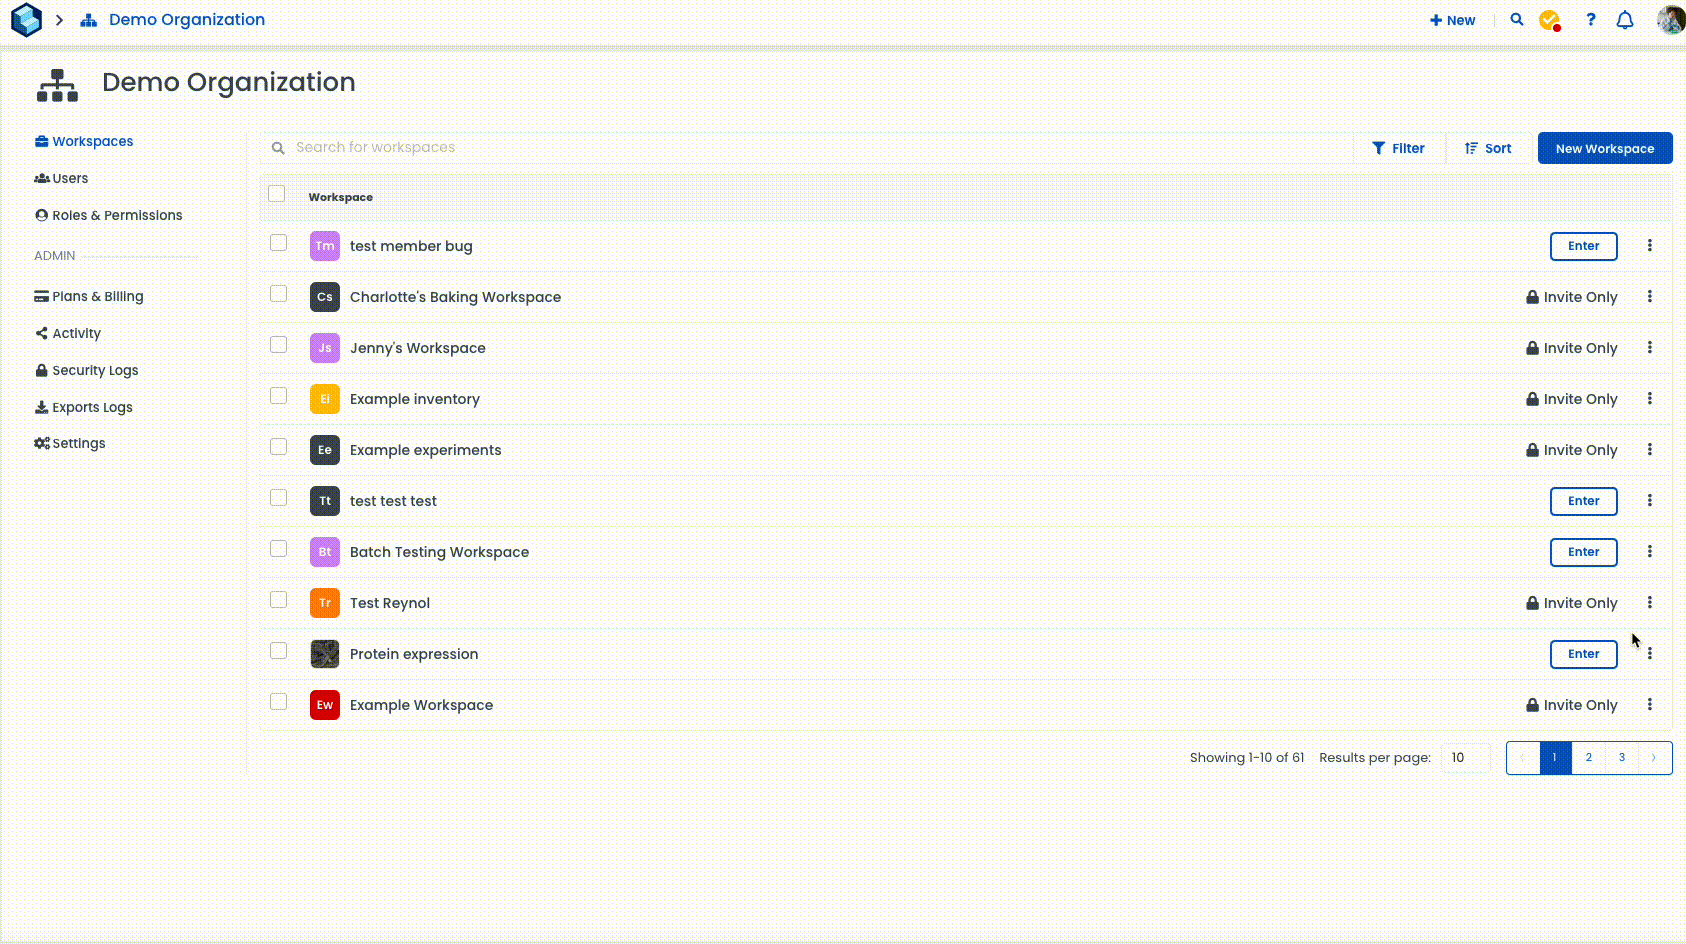
You can also manage workspace members and their permissions from the Workspaces tab of your Organisation.
Please note this is only available for Labstep Academic Plus, Pro and Enterprise users
When you sign up to Labstep, you will, by default, be added as a "Member" to your organisation's account. The user(s) in charge of the organisation's overall Labstep account will have the "Admin" user role. The user role will dictate your ability to view/delete all workspaces, even "invitation-only" ones. If you have external stakeholders that need to have visibility over specific content, you can add them as a "Guest" to your organisation.
As an admin, you can view/delete any workspace within your organisation, create/manage workspaces, create/manage custom permissions, and invite/remove members from the organisation.
As a member, you can create a new workspace (except if an admin has disabled this function), be invited to join other workspaces and view any workspace you are a member of.
As a guest, you will only be able to see the Workspaces you are added to. In the workspace where you are added, you are automatically set with Viewer permissions, and therefore you cannot edit anything.
Labstep team tip: When you create a workspace, you automatically become its owner, regardless of your user role. You can use this workspace to work on private projects and then share them with another workspace you belong to.
Please note this is only available for Labstep Academic Plus, Pro and Enterprise users
As an admin, you can manage a user's role by appointing them the role of 'Admin' if they were a "Member", demoting an "Admin" to "Member", and adding guests.
Click on your organisation's name
Navigate to "Users"
Click on the vertical ellipsis ⋮ next to the user's name and role of your choice
Click on "Make Admin" or "Make member"
This can be done in bulk
Labstep team tip: To learn how to add or remove a user, check out this article. When performing such tasks, please remember to inform your dedicated Account Manager, as this will most likely affect your billing.
Please note this is only available for Labstep Academic Plus, Pro and Enterprise users
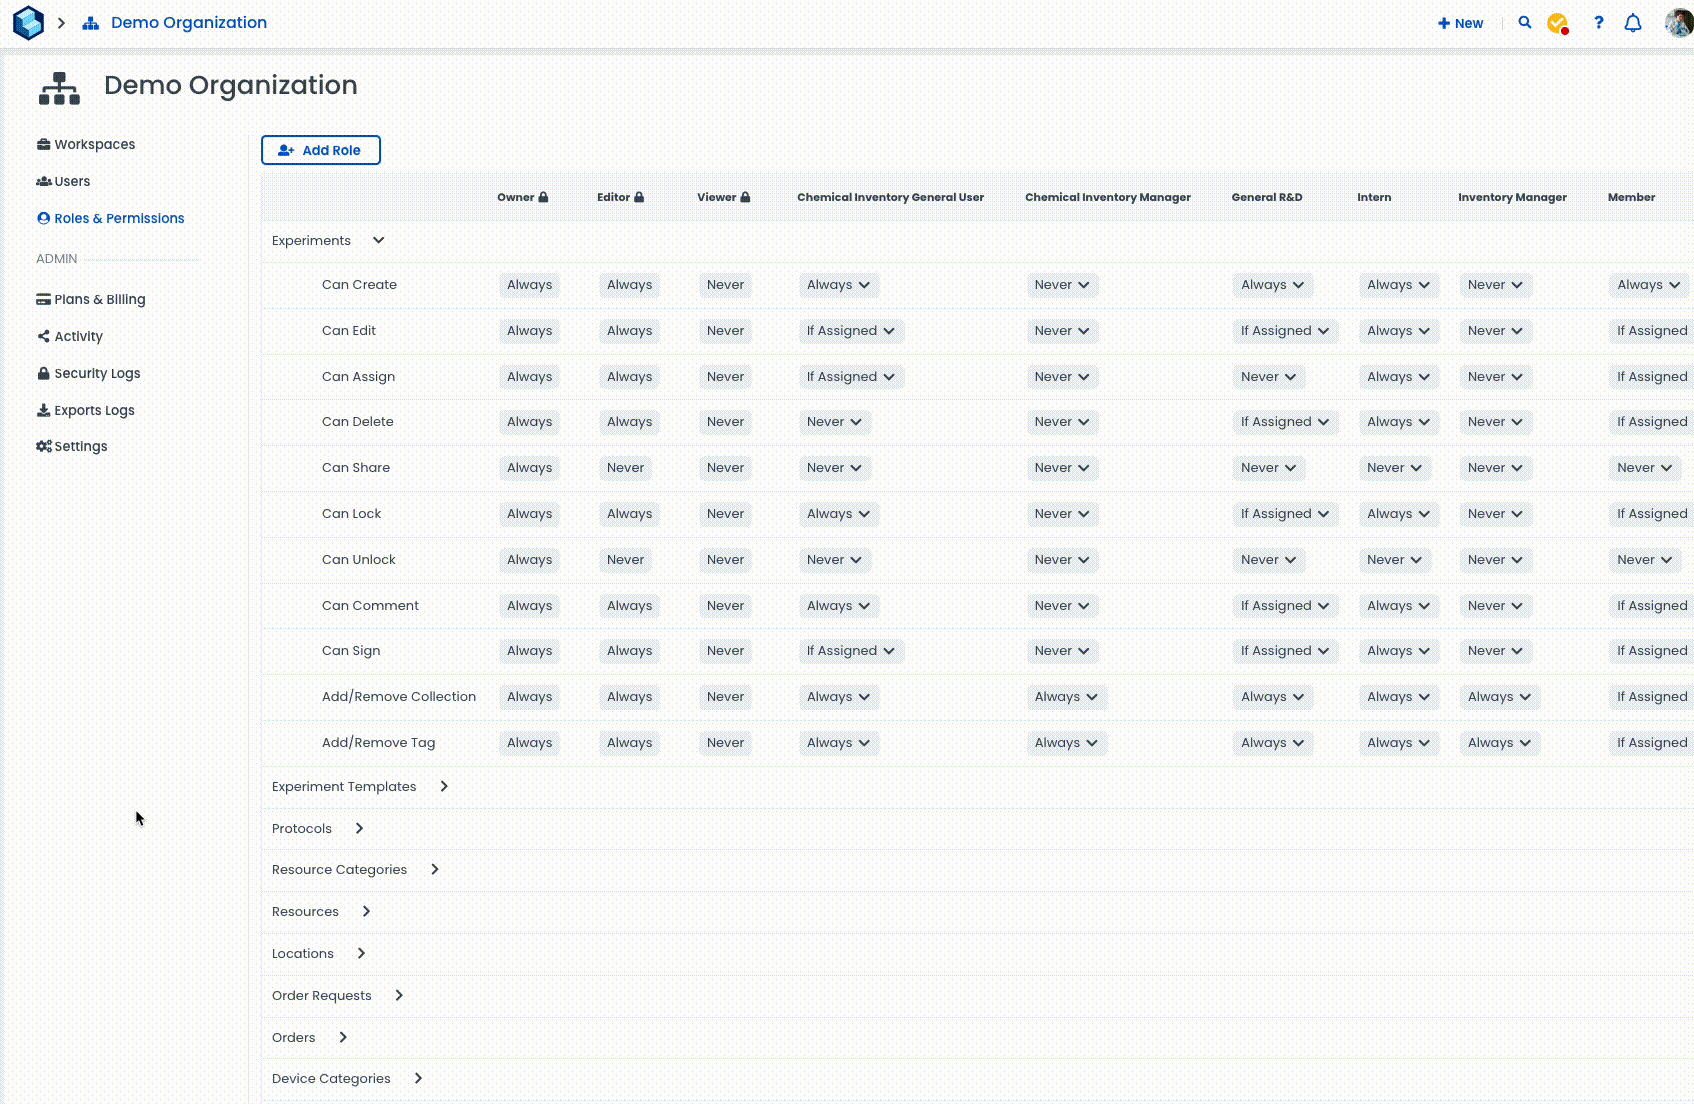
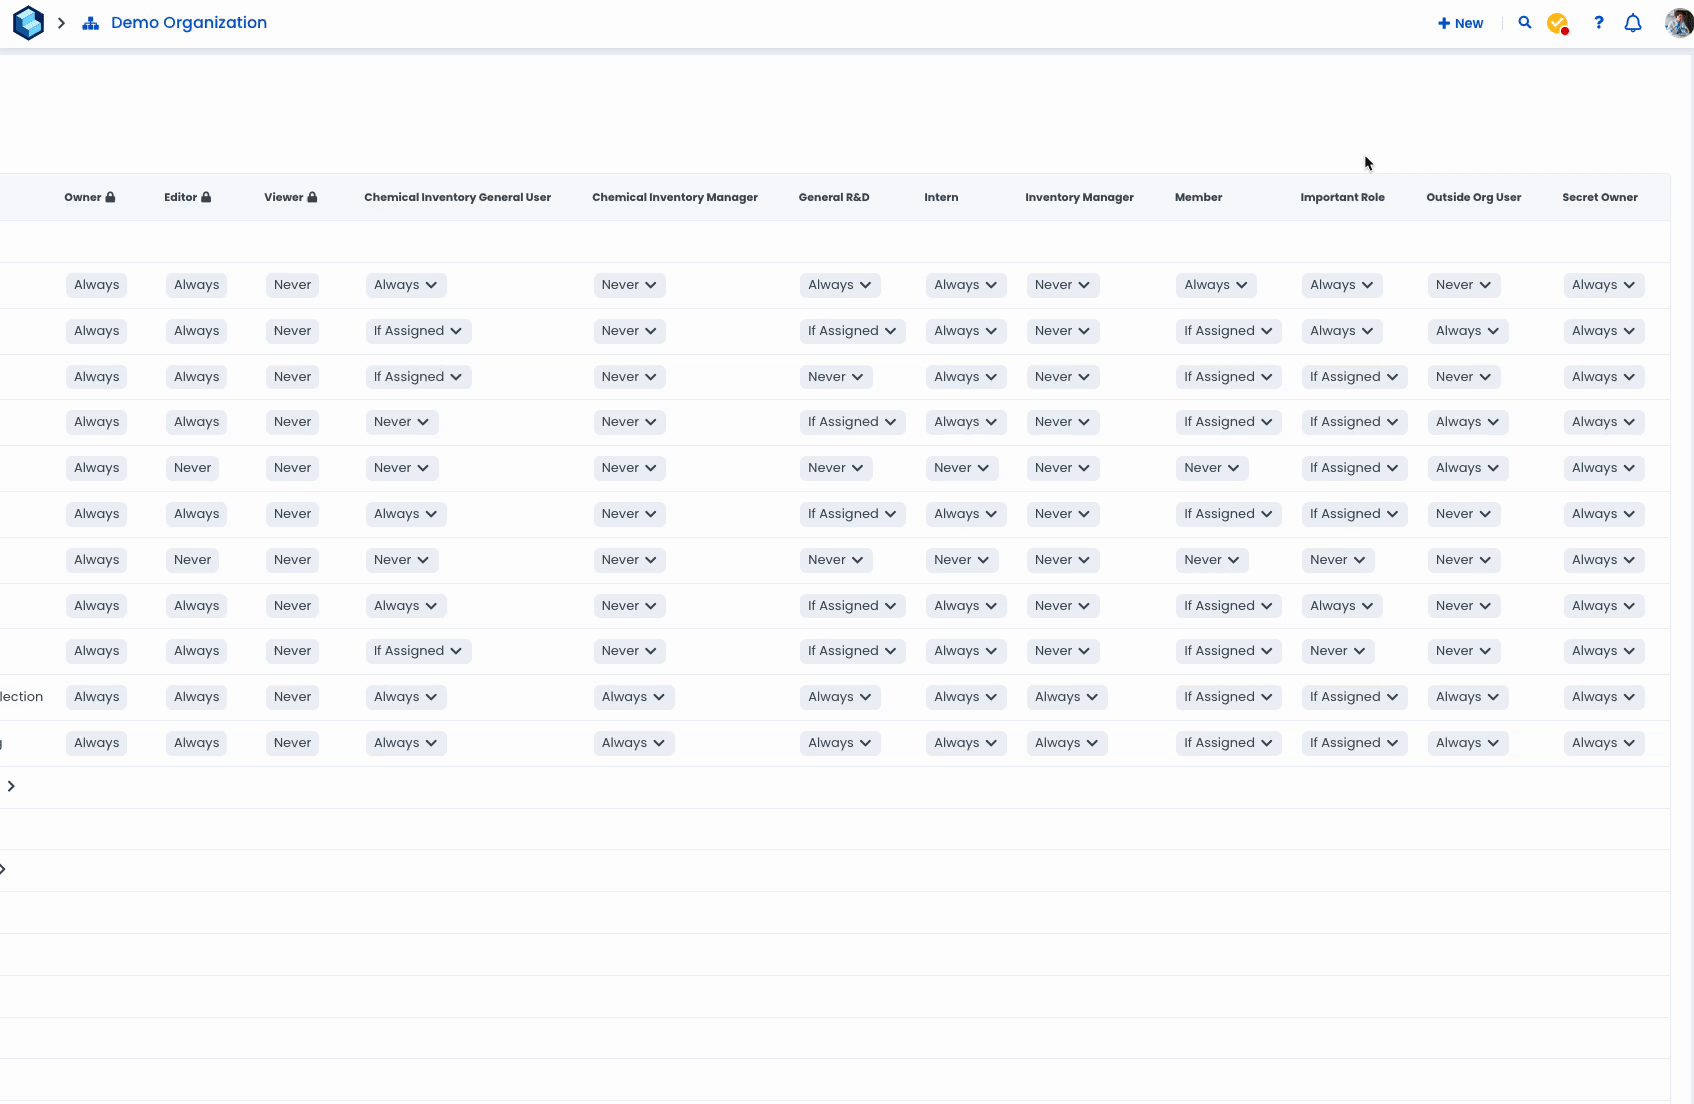
This feature enables Organisation Admins to control who does what more granularly by creating custom workspace roles and selecting permissions.
Navigate to your organisation's home page.
Click on "Roles & Permissions".
Click on "Add Role".
Enter a name, then click on "Create".
Select this role's permissions from Experiments editing to Tags management.
Create as many roles as necessary!
Labstep team tip: If you need help creating and managing roles, please contact your dedicated Account Manager or our team using the in-app chat or [email protected].
A user will always be able to perform this action regardless of whether they are the creator, a collaborator, or assigned to the content.
A user can only perform this action if they have been assigned to the content. For example, in an experiment, Managing Collaborators>Assigned will enable the user to perfect all experiment-related actions if their permissions are "If Assigned".
A user will never be able to perform this action even if they are the creator, a collaborator or assigned to the content.
Click on ⋮
Select "Edit"
Amend as necessary
Click on ⋮
Select "Delete"
Click on "Delete"
Still need help?
Contact us here or start a conversation with a member of our team using our in-app chat.
