Congratulations on successfully creating your Labstep account! You probably now want to know how you can start benefiting from it. The first step is to set up your workspace. Keep reading to find out what you can do within your workspace. Want more? You can check out our Advanced Features collection here.
When you log into your Labstep account, you will automatically be taken to your ‘Home’ workspace. If you wish to have a private workspace, you can create a new one and restrict its access. To view all your workspaces, click on the downwards arrow next to your workspace’s name, then click on ‘All workspaces’.
Click on the downward arrow next to your workspace’s name
Click on ‘New Workspace’
Choose a name for your new workspace, then click on ‘Create’
That’s it! Welcome to your new workspace!
Note: Nested workspaces are an Organisation level feature that allow you set up a hierarchy of workspaces. Contact our sales team to add this feature to your organisation.
You will need to have permission to create workspaces in your organisation to create nested workspaces. If you wish to add a sub-workspace to an existing workspace, you will also need to be an owner of the existing workspace.
To create a nested workspace, either:
From the workspace overview page, select the 3-dot menu next to a workspace and select
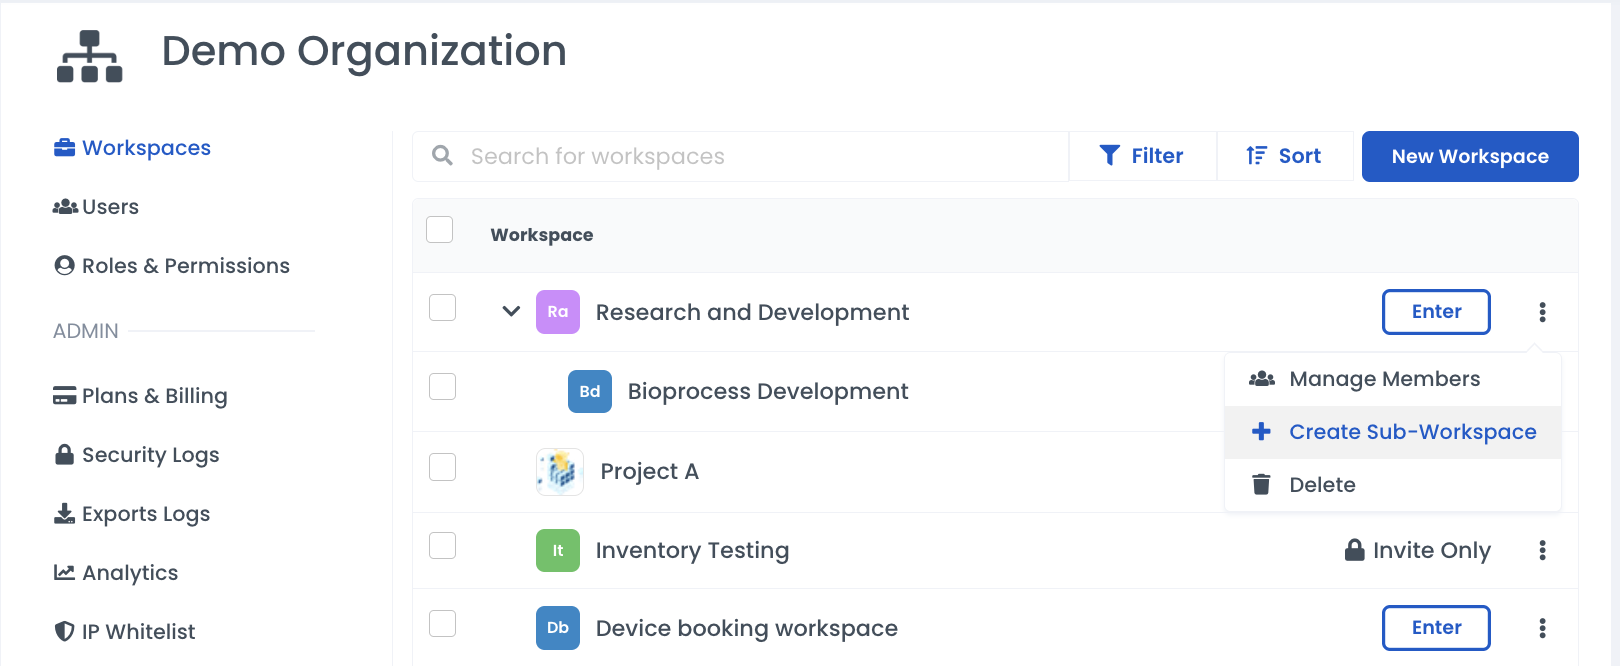
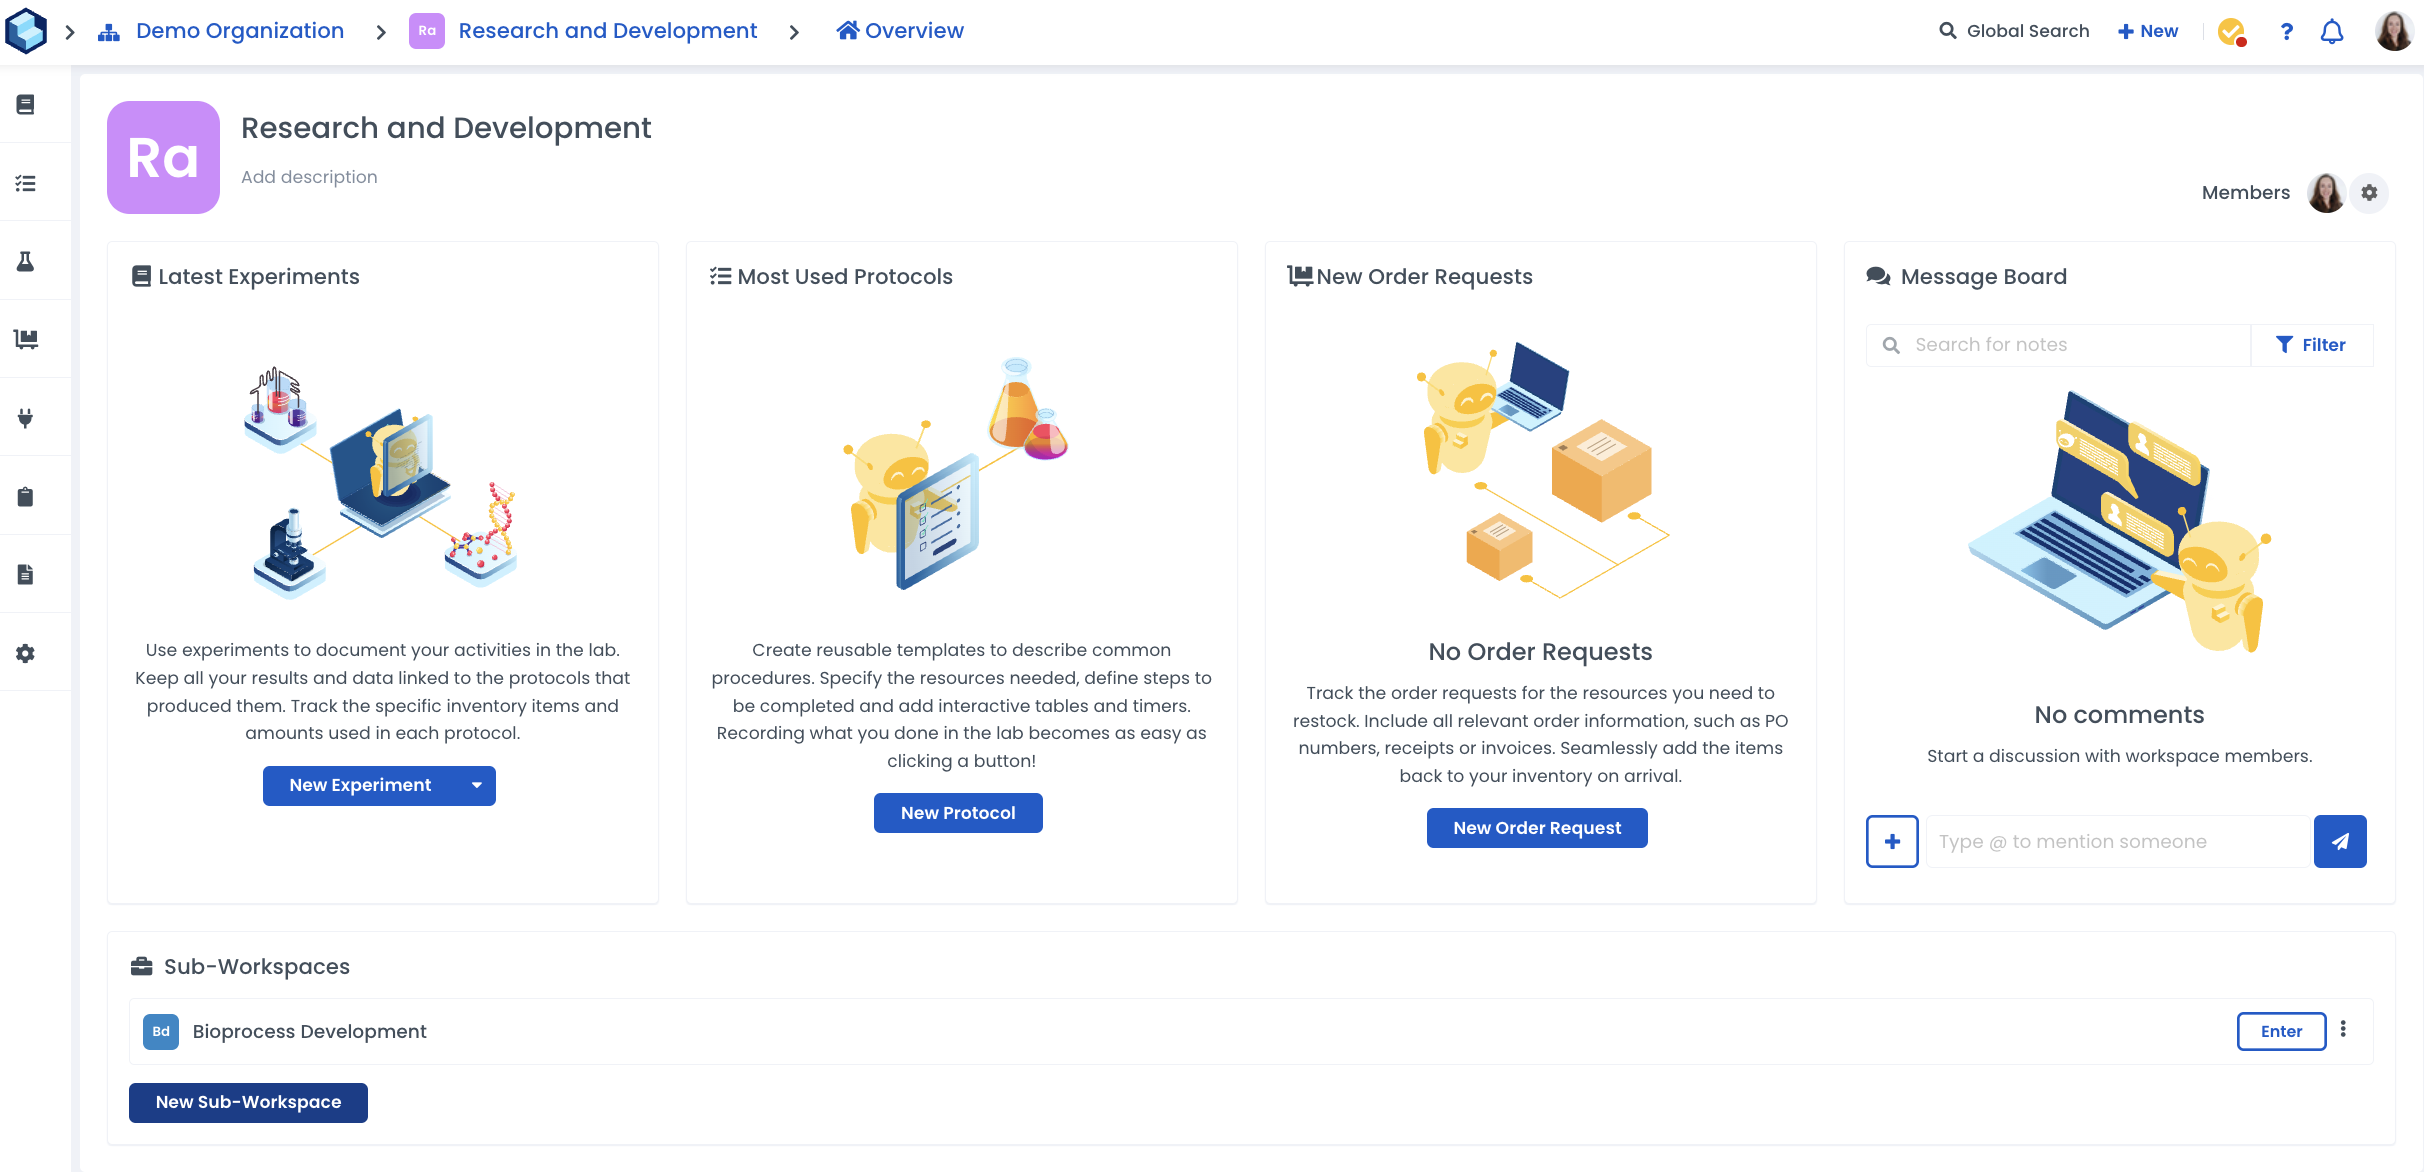
Or, from within a workspace, select the blue 'New Sub-Workspace' button at the bottom of the workspace overview page.
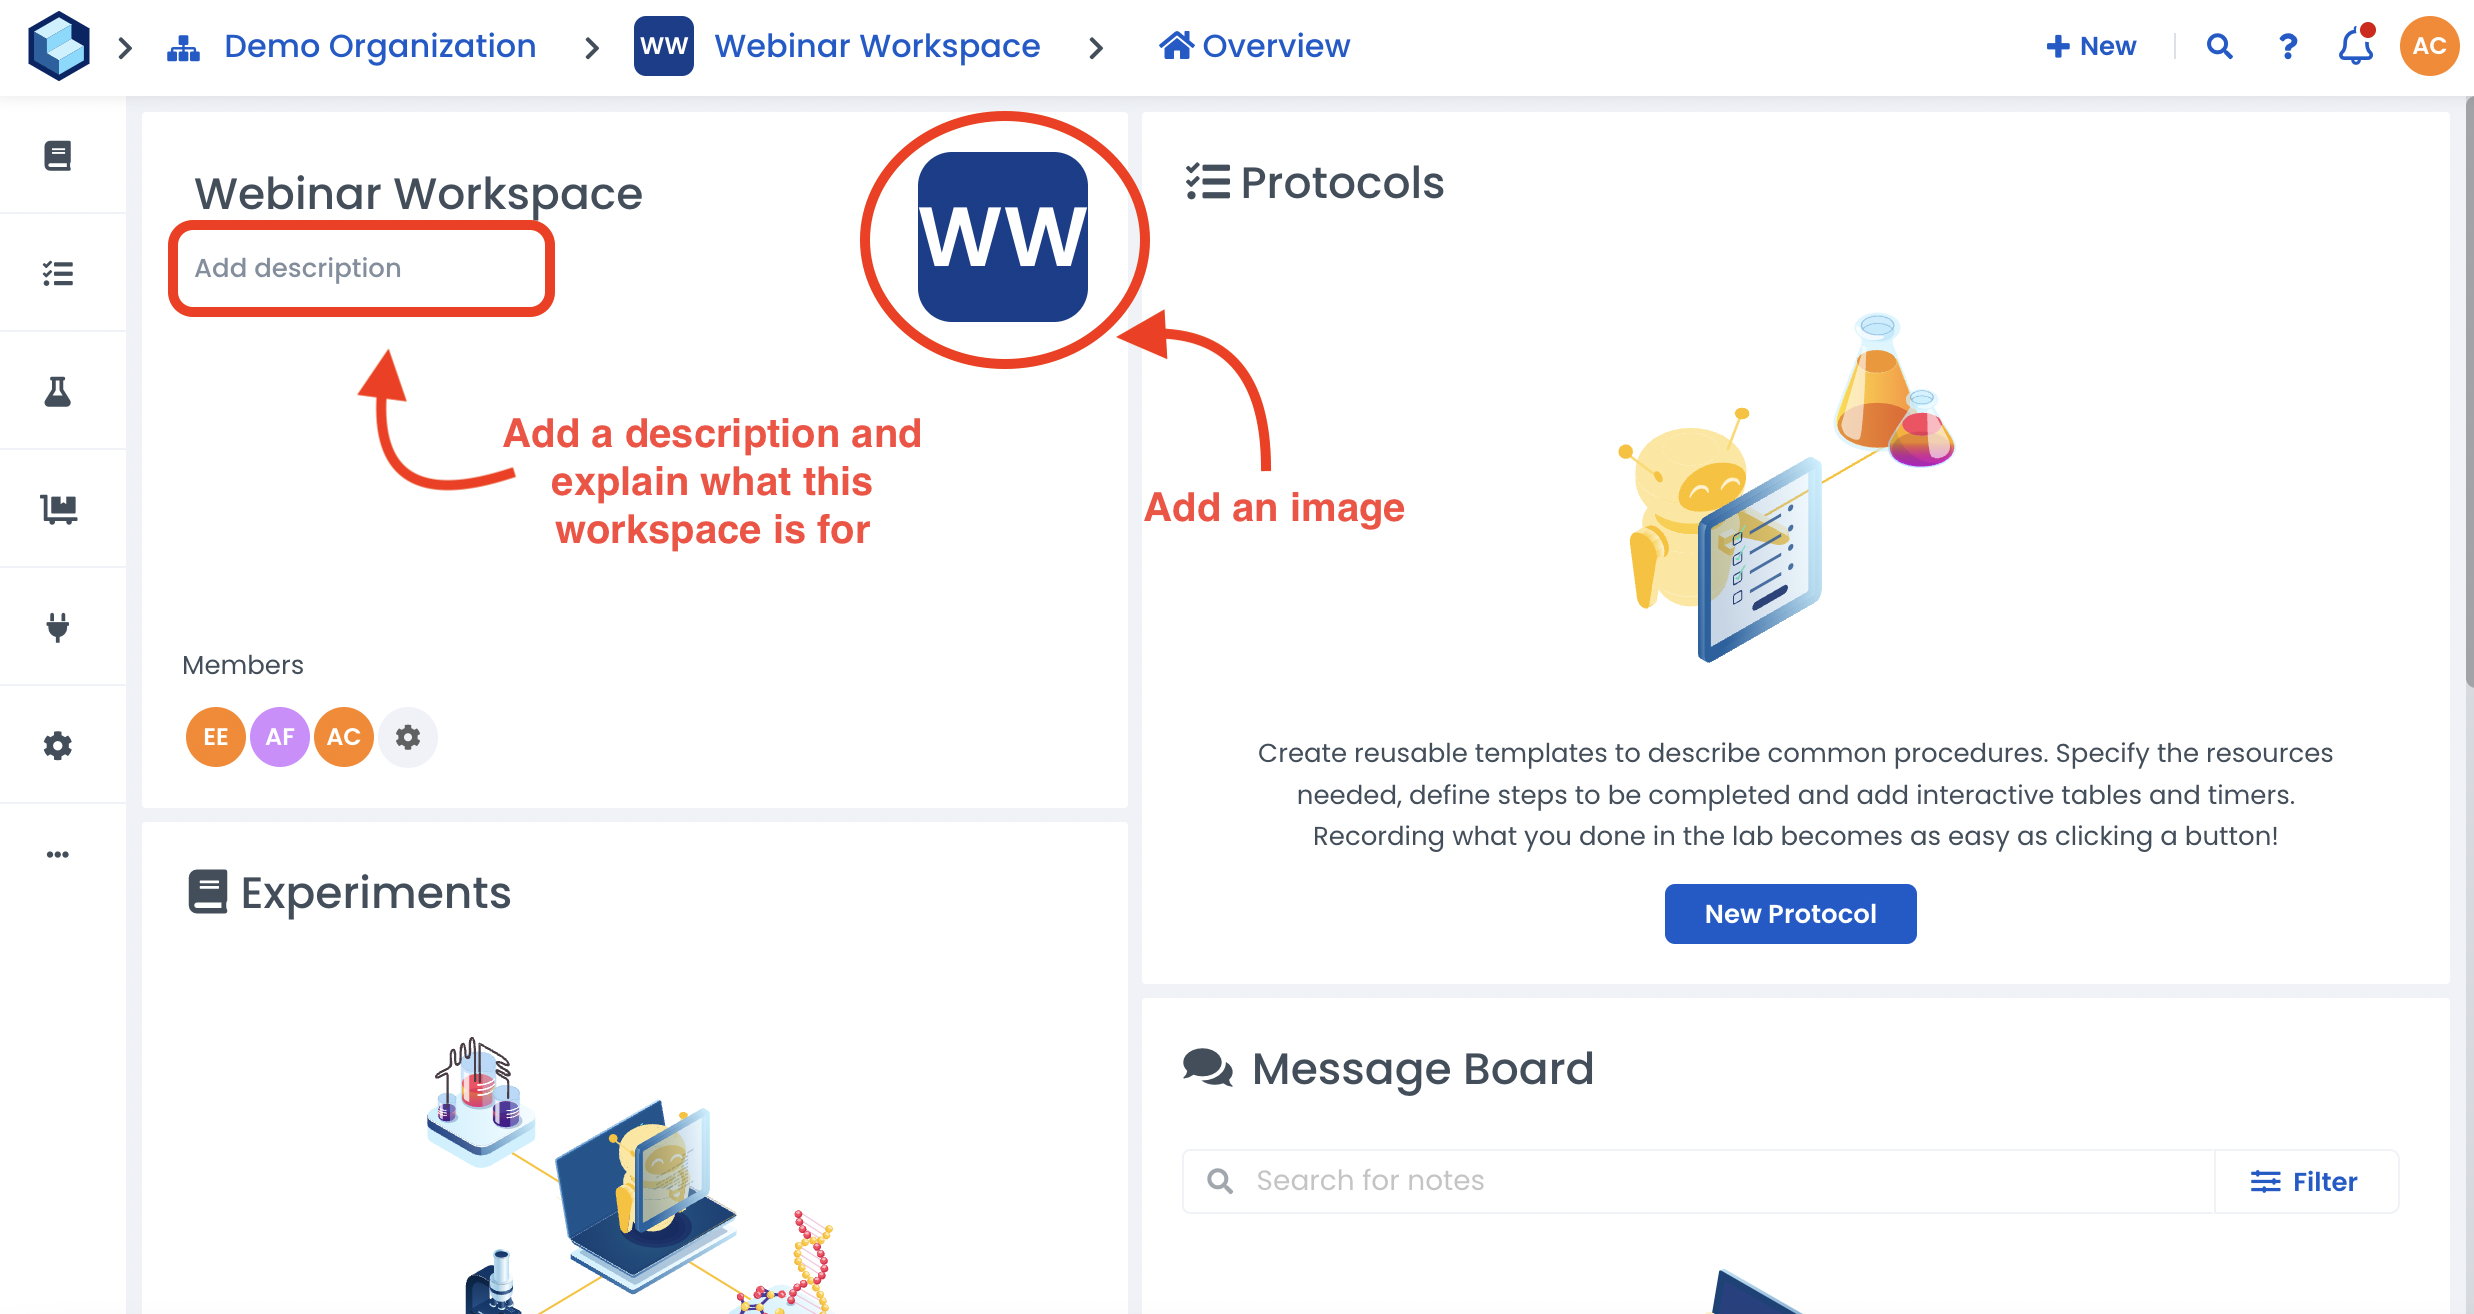
From your workspace, click on ‘Add description’ and write what this workspace is for
To upload an image, click on the icon with your workspace’s initials next to the description
Select a picture of your choice, then click on ‘Open’
Click on the ‘Invite’ button
Select the appropriate Permissions
Either Copy-Paste the share link or Email it directly to your collaborator
Click on ‘Send’ (email only)
Labstep team tip: You can edit the displayed message before sending the email! To manage workspace members, please navigate to your Workspace Settings>Members.
Click on the gear icon next to your profile icon
Click on ‘Add Members’
Click on the downward arrow
Select a user from your organisation
Edit ‘Permissions’ if necessary
Click on the vertical ellipsis ⋮, then on 'Remove' to remove a member
Labstep Team tip: If a member has edit permission only (‘Can view & edit’) and needs to share content with other workspaces, only the ‘owner’ can either promote them as co-owners of the workspace or transfer ownership of the content to them on a per-content-item basis.
Please note that this is only for workspace Owners and organisation Admins.
Navigate to the workspace settings
Click on the “Members” tab
Click on the vertical ellipsis ⋮ next to the name of your choice
Click on “Remove from workspace”
Click on the downward arrow next to your workspace’s name
Click on ‘All Workspaces’
Click on the vertical ellipsis ⋮ next to the workspace of your choice
Click on ‘Set as Home’
All done! Every time you log in, you will now automatically be taken to this workspace!
Click on the gear icon in the left-hand sidebar menu
Click on ‘Delete’ at the top right-hand corner of your screen
Labstep team tip: You can restore a workspace by navigating to All Workspaces> Filter> Deleted. From there, click on the vertical ellipsis next to the workspace you wish to restore and click on ‘Restore’.
Still need help?
Contact us here or start a conversation with a member of our team using our in-app chat.
