QR codes are a great way to keep track of your items. They allow you to quickly display the Labstep records for an item where you check its metadata or update relevant information such as its availability, location or amount remaining.
This article will guide you through using Labstep in conjunction with a label printer to print customisable QR code labels for all your inventory items.
Follow these simple steps to create your labels with barcodes/QR codes in Labstep:
Navigate to the inventory section of your workspace settings and select the 'Label Templates' tab.
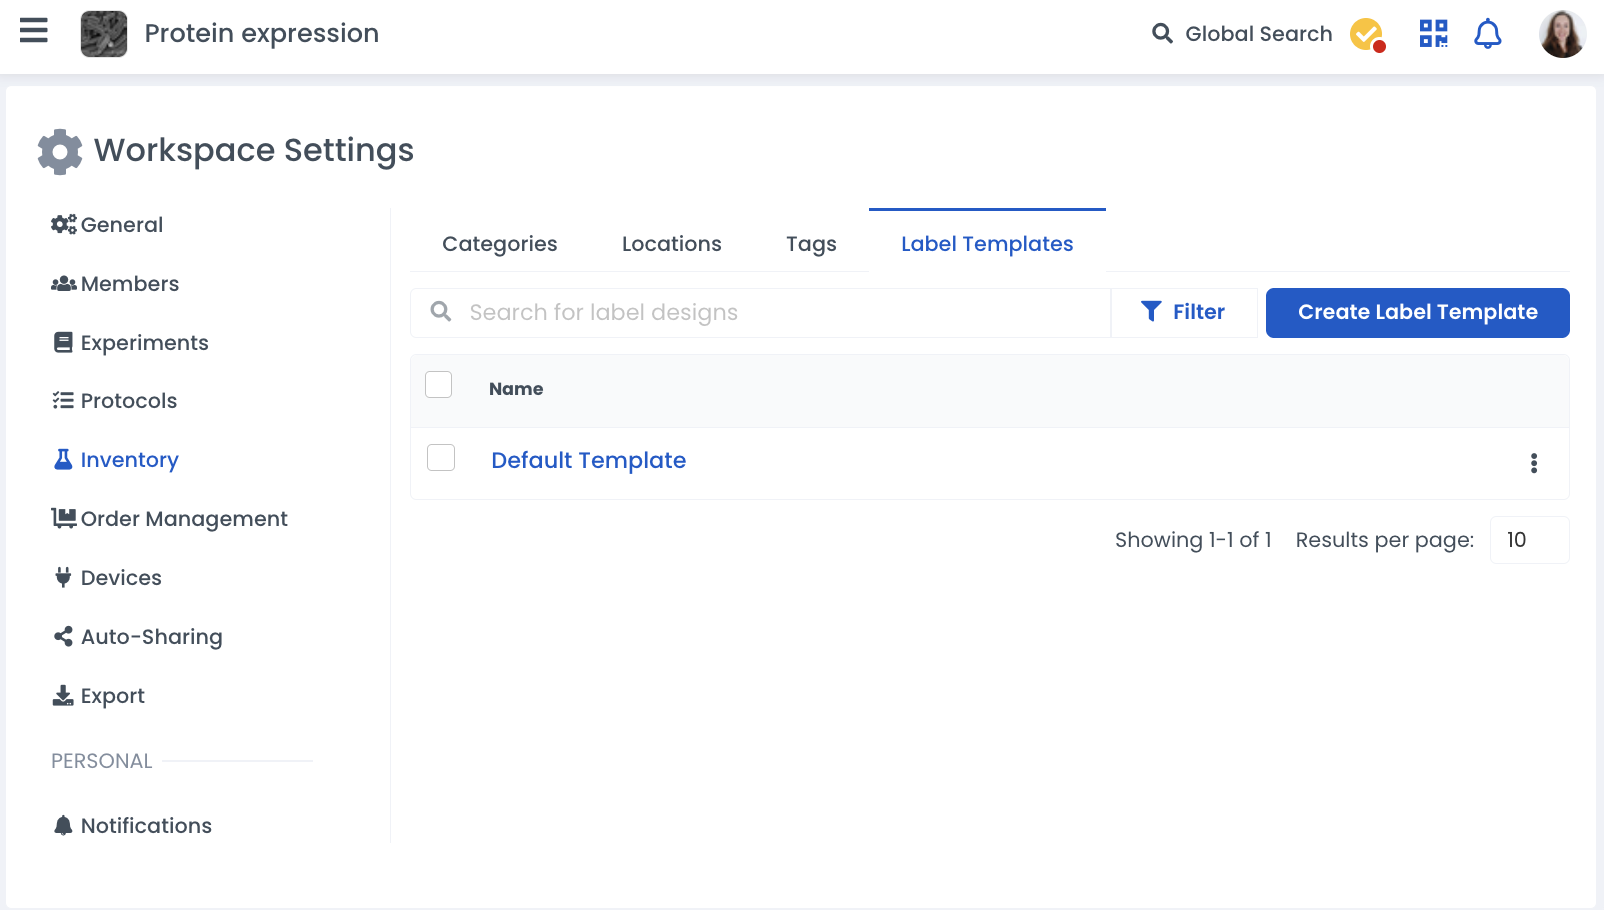
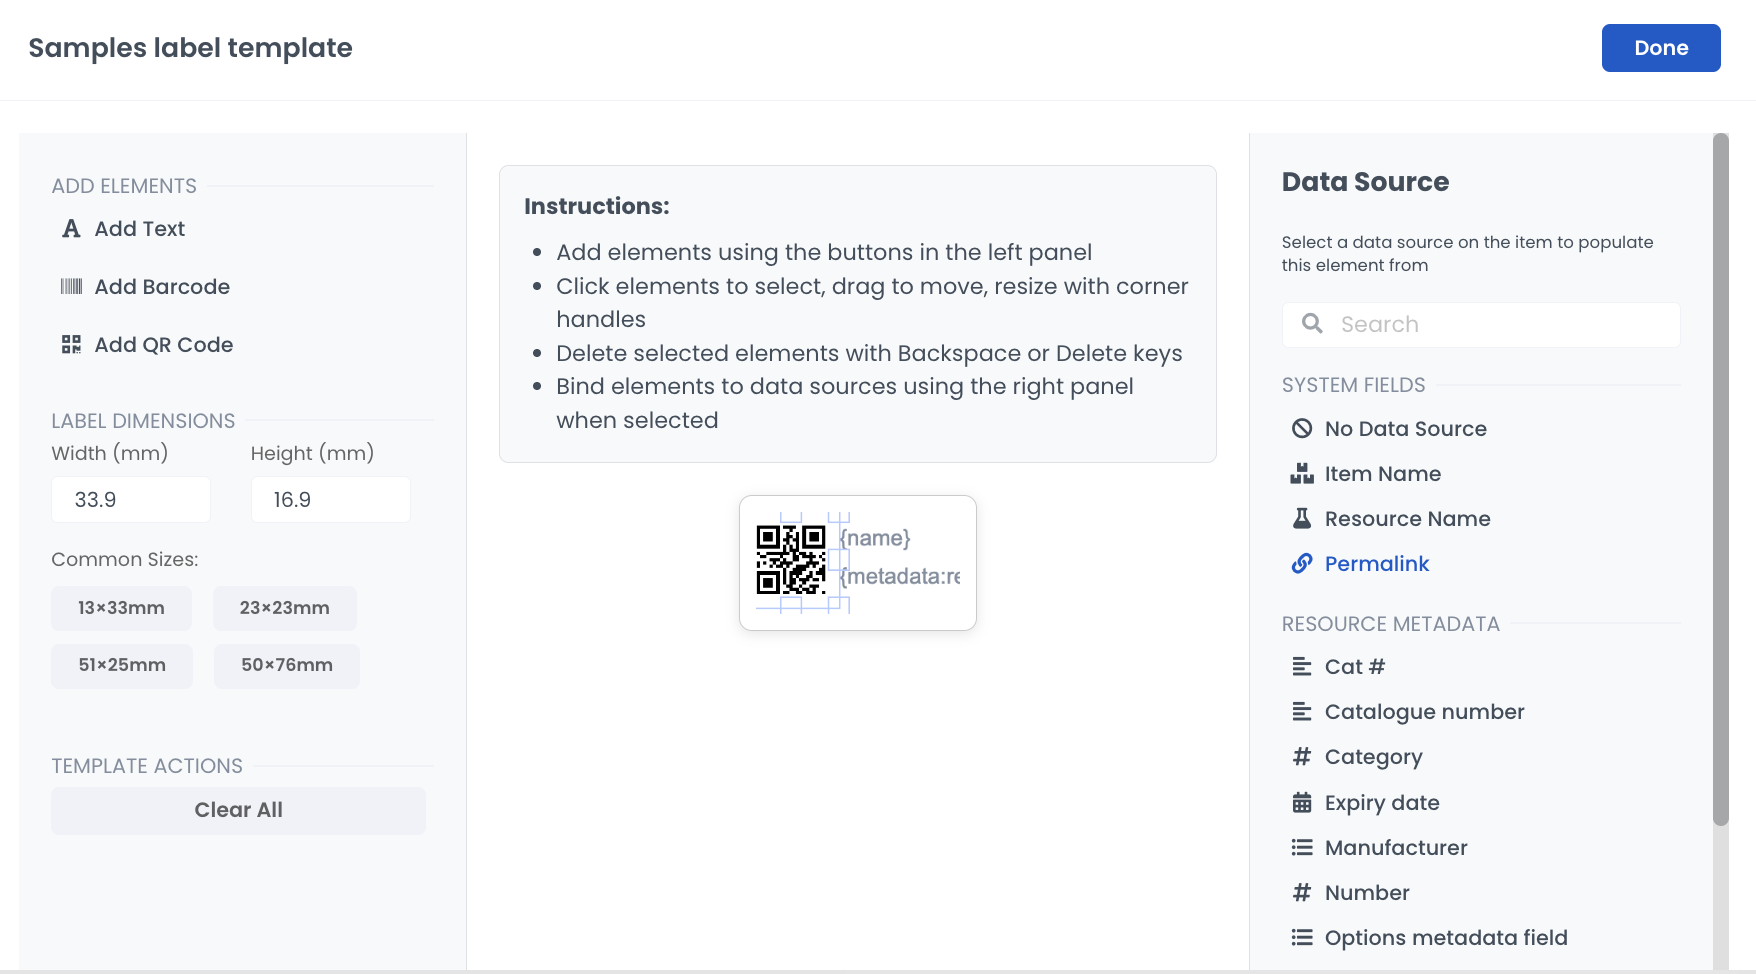
Select the blue 'Create Label Template' button to set up your template. In the label designer use the left hand pane to edit the label size and add text, QR code or barcode elements. Use the right hand pane to attach a data source to the elements. An example design could be:
A QR code element, which directs to the item's permalink (URL).
A text element, which contains the item name.
A text element, which contains a metadata field such as expiry date.
Name your template in the field at the top and click 'Done' once your template is ready. You will see your template appear in the list of available label templates in your workspace.
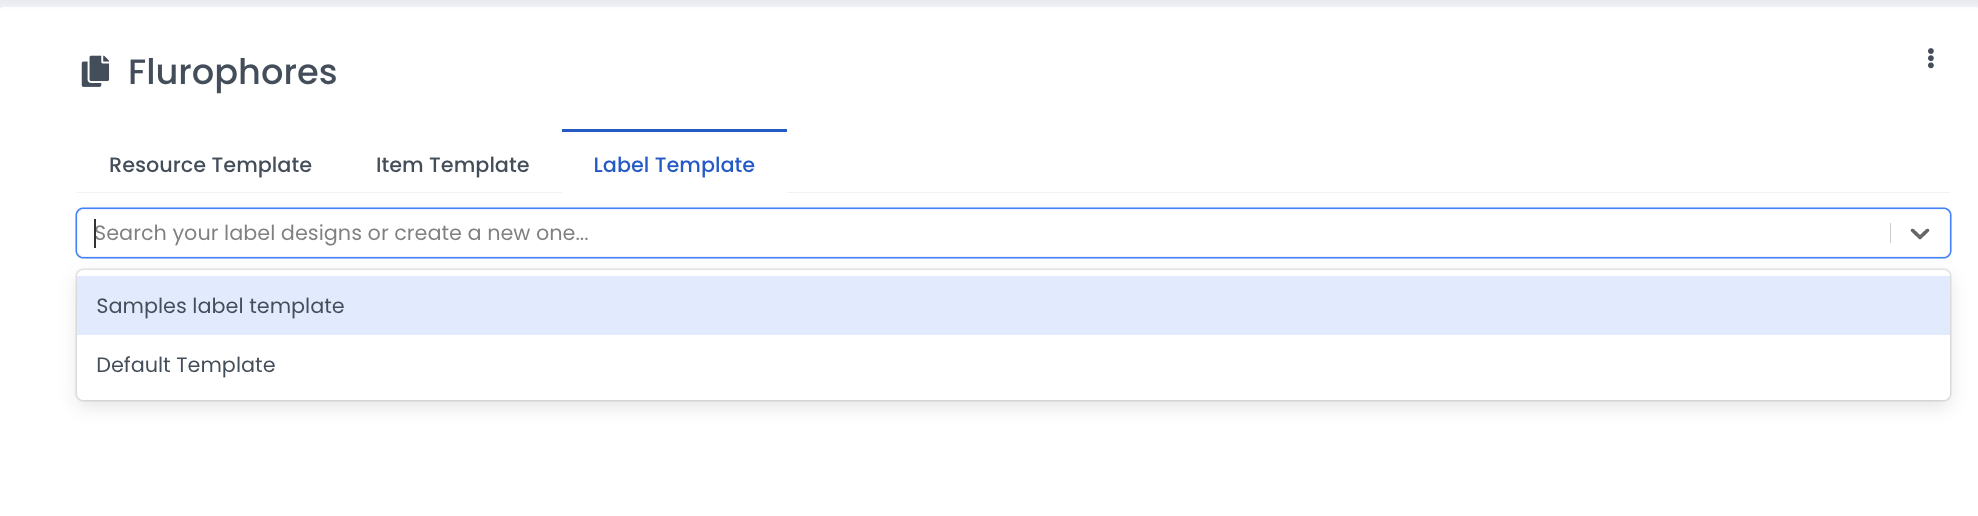
In your inventory or workspace settings, open the resource category settings by clicking on the cog icon and navigate to the 'Label Template' .
Select your label template; this template will now be applied to the items within this category.
In the inventory, navigate to the items view and select the items that you wish you print labels for.
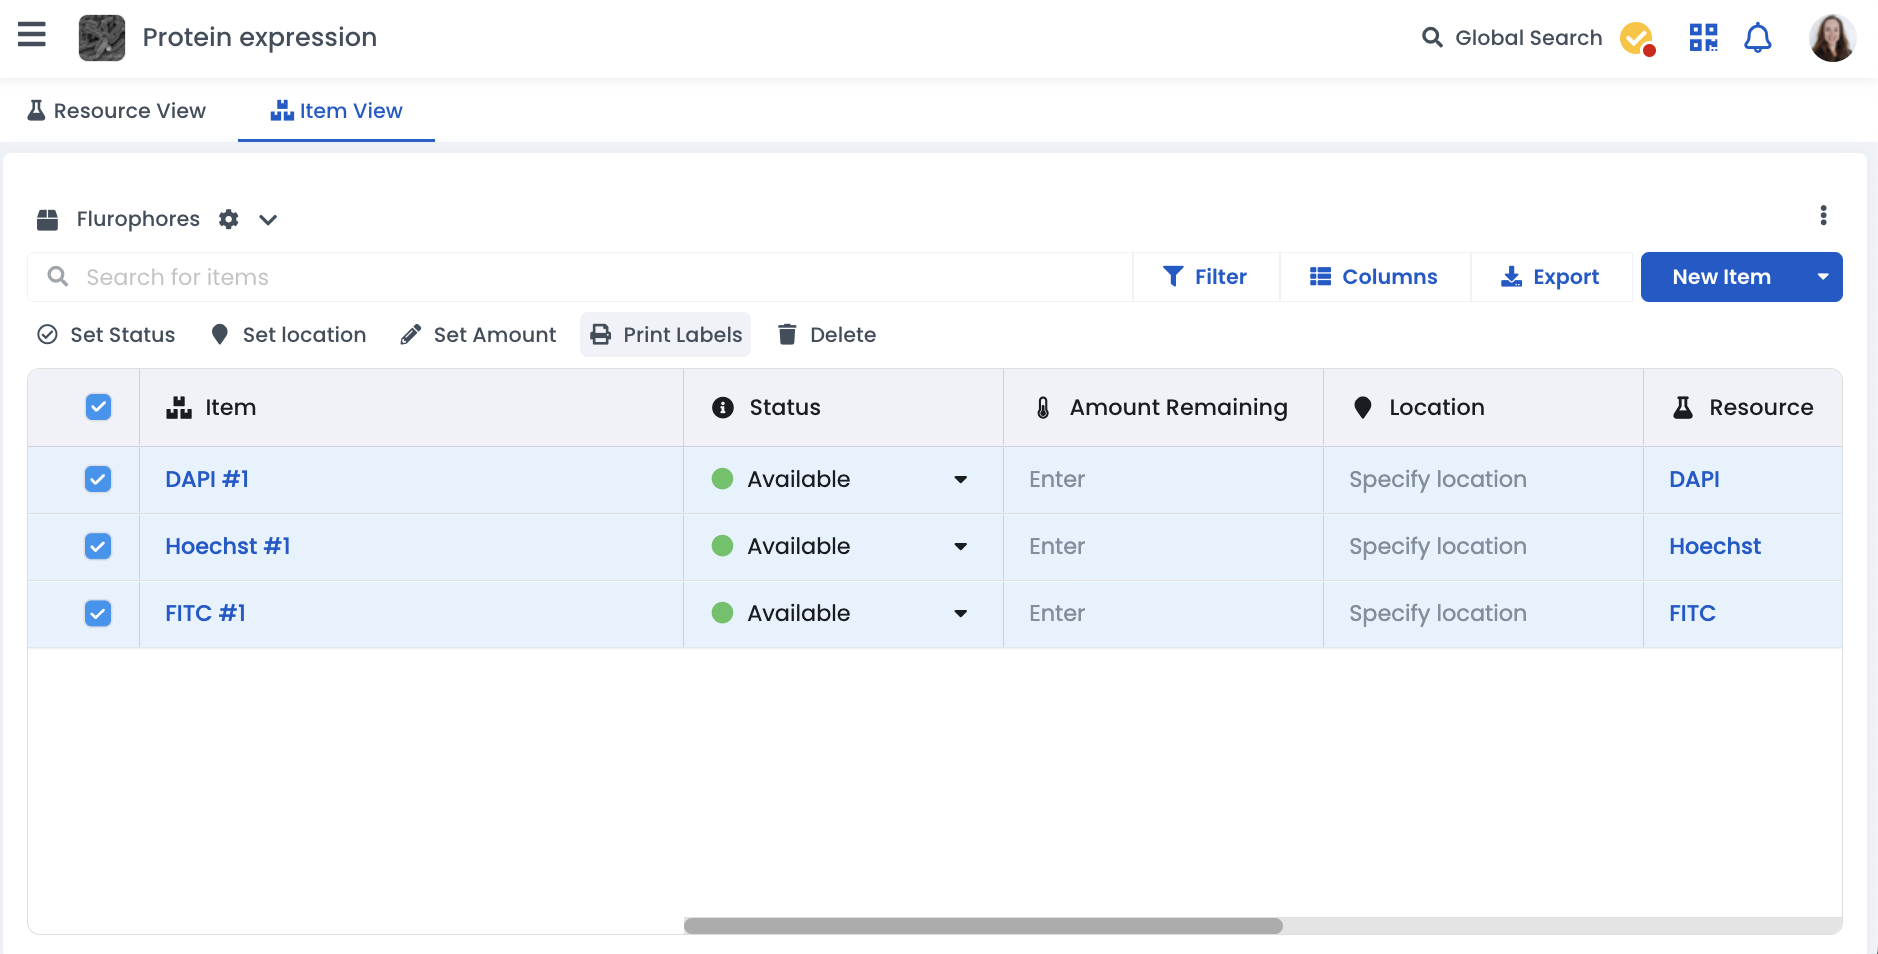
After selecting the items, the 'Print Labels' button will appear on the top menu. Select this and you will be directed to your system print dialogue to preview and print your labels.
You must have exported your data first to follow through with this article. To learn how to do that, click here.
Please note that we currently don’t support barcodes. You would need a different integration for this.
To print your labels, you will first need to set up a template to specify what information appears on the label, including the all-important QR Code field.
For Brother printers, this can be done with the P Touch Editor software that comes with the printer. See here for more information on how to create a label template with a QR Code.
For Brady printers, this can be done in the Brady Workstation software (you'll need the Custom Designer Add-on). See here for more.
For Zebra printers, this can be done with the Zebra Designer Pro version. See here.
Once you have set up your label template, you will have to import the data from the CSV file you exported.
This can be done in P-Touch Editor for Brother printers, as shown here.
For Brady printers, see here.
For Zebra printers, see here.
The final step is to print the labels and stick them onto the correct items.
After completing the final step, you scan the items with any QR code scanning app, and you will be taken to the item page. From there, you will be able to see and update all of the item's information.
Labstep team tip: You can also use the QR Code to do a stock check in-app on Labstep!
Still need help?
Contact us here or start a conversation with a member of our team using our in-app chat.
