Scientific experiments typically require the simultaneous processing of multiple samples and the generation of multiple data points. Smart tables in Labstep help you to structure your experiments that contain an array of inputs and outputs
To get started with Smart Tables, use the forward slash command and select the Smart Table option. The number of Conditions in your smart table is the number of individual samples, runs or different variables in your experiment. Click on the +Add Conditions button to add more rows to your smart table.
The information in your table can be either inputs or outputs to the experiment or protocol that the table appears in. Both inputs and outputs can be either of the type inventory or data fields.
Field type | Application | Examples |
Input inventory fields | Resources and items from the inventory used in the experiment. | - Reagents - Strains - Samples |
Input data fields | Input parameters to the experiment. | - Incubation temperatures - Instrument settings |
Output inventory fields | Samples created in the experiment | - Transformed cells |
Output data fields | Capturing output data | - Measurements, readings, observations, etc. |
Inventory fields in the smart table can be restricted to a specific resource category and resource.
For input inventory, the items to be used can be selected individually, or in bulk by highlighting multiple cells and choosing the 'Select Items' button.
Any metadata fields related to the inventory items you would like to see in your experiment can be viewed in the smart column by selecting them as a column in the right-hand configuration pane.
For output inventory fields, items can be created and saved to your inventory when you run your experiment or protocol in an experiment. Note: You will not be able to add items to output inventory fields when creating a protocol, only when running it.
You can also add columns for amounts. In the case of input inventory fields, this is the amount used in the protocol or experiment. This amount can then be deducted from the inventory by selecting the yellow check mark at the top of the column. For output inventory fields, the amount column indicates the starting amount for the item created in your inventory. NB, this column should be filled in before creating your item, so that your items initialise with the correct amount.
New inventory items can be created directly from your smart table by clicking the 'create' button in the output item column for each condition. To create the inventory items in bulk, you can do it one of two ways:
Restrict the items to a particular resource. All the new items will then be created using the default ascending numeration pattern for their name.
Restrict the items to a particular resource category with a custom identifier enabled. A new resource will be created for each new item. The custom identifier on each new resource will be incremented by one and will be used for naming the newly created items.
For both of these options, a yellow check box will appear at the top of your output inventory column. When this is selected, the items for each condition in the table will be created in the inventory. The check box will turn green once the items are created.
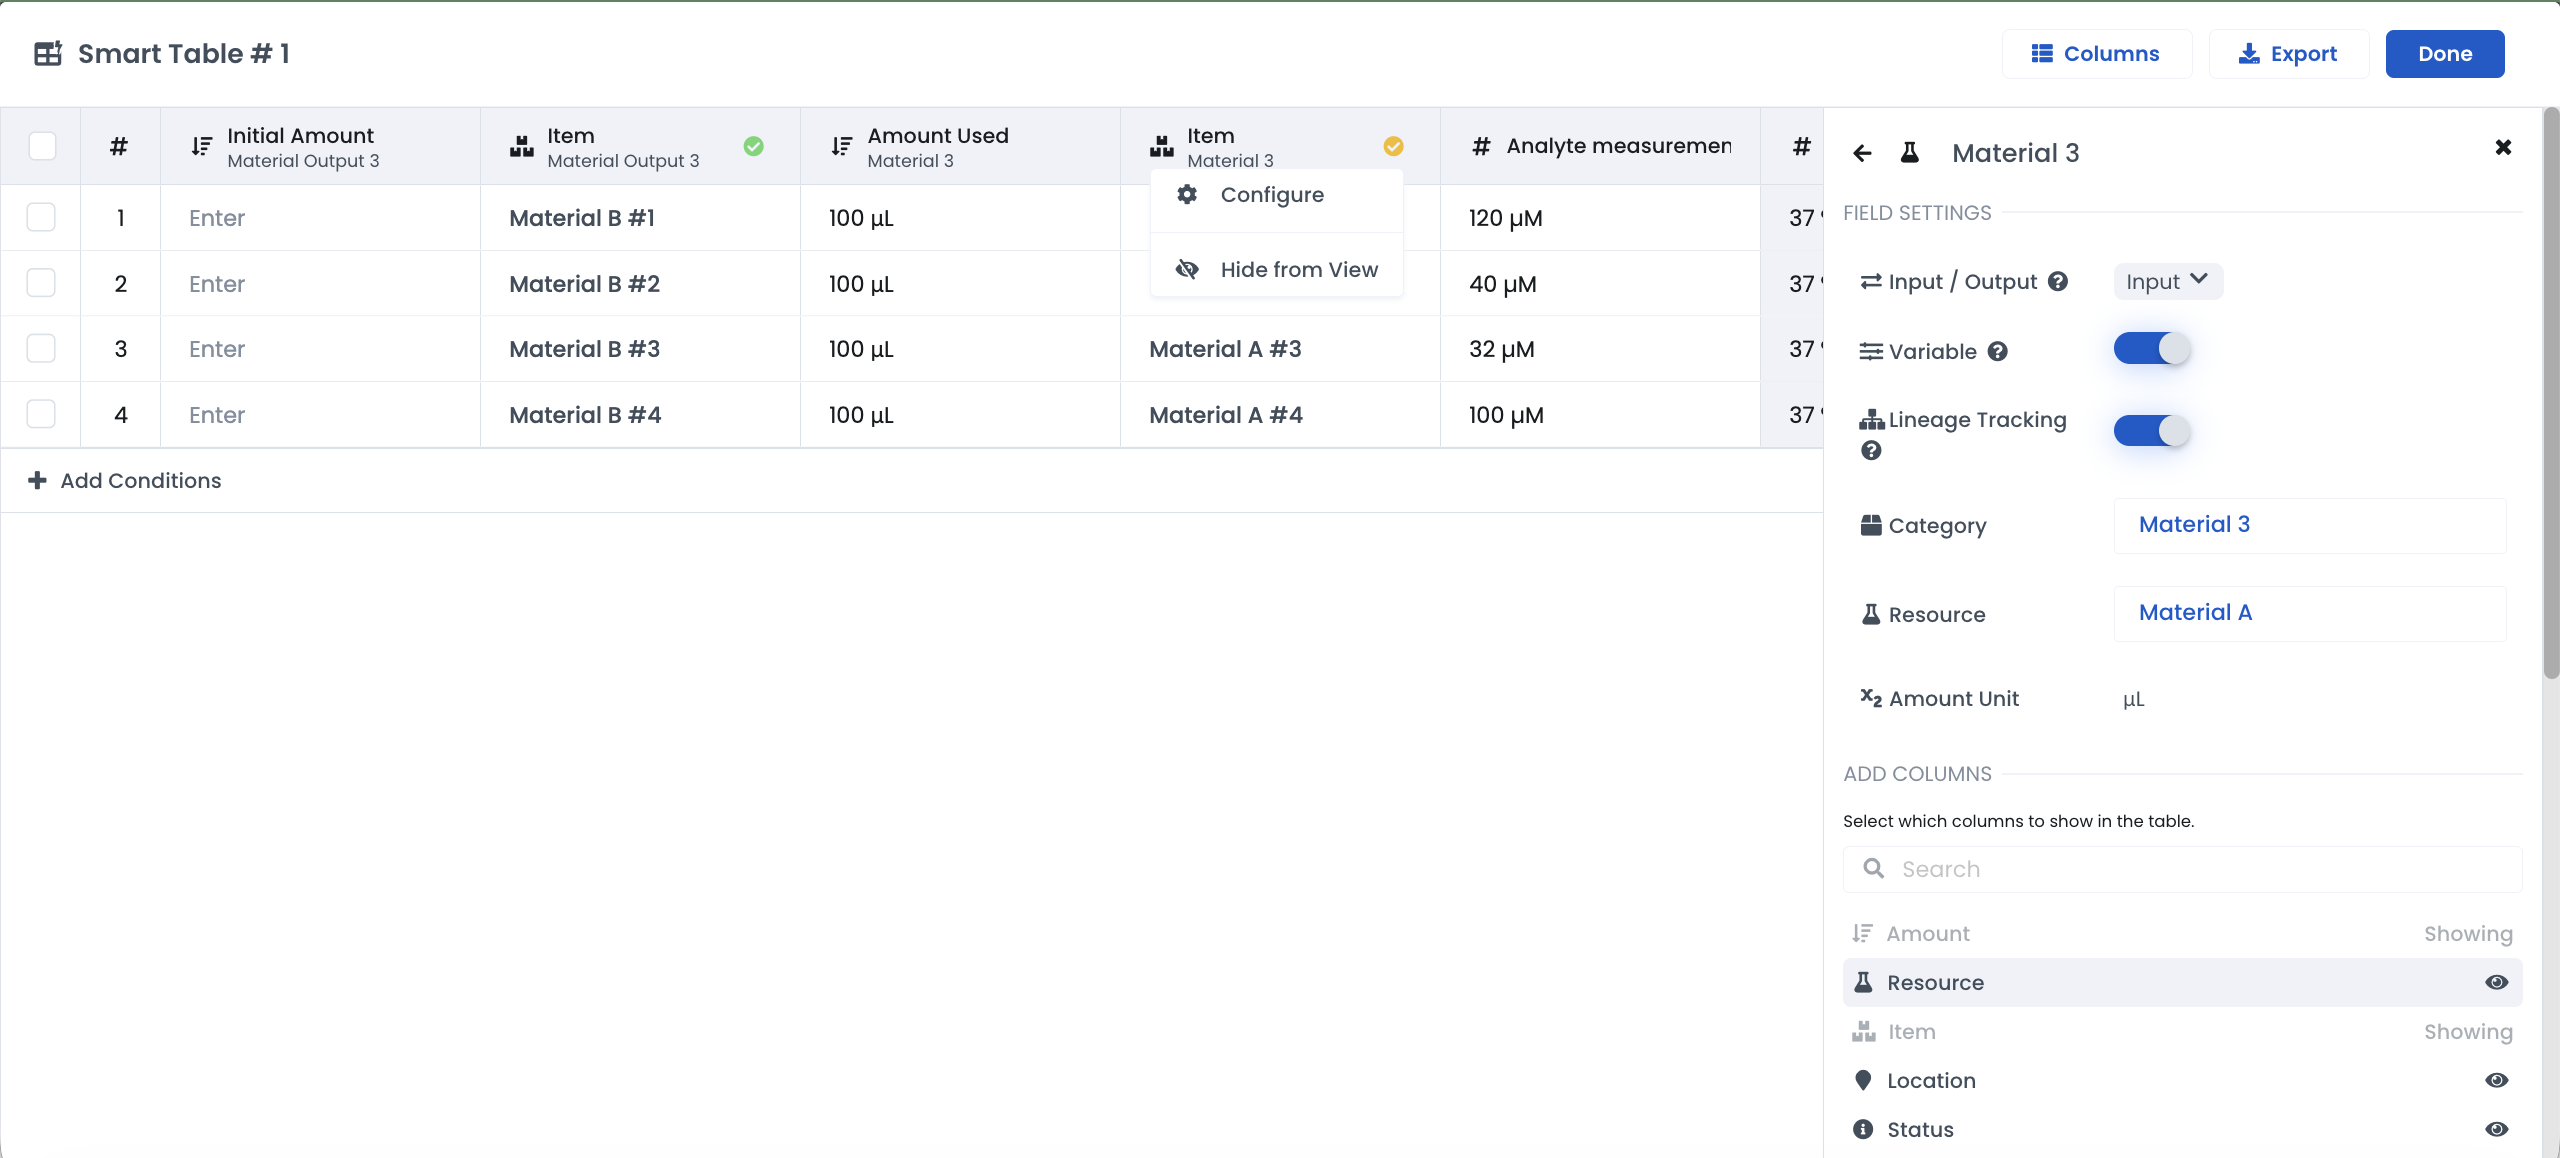
Should you require the resource names to appear in the table as well, for example, if your conditions use different resources, you can select this by going to the configuration pane for the item and selecting 'Resource' in the add columns section.
Both input and output data fields work like standalone data fields in Labstep. Each data field column can be one of the standard data types on Labstep: Text, Date, Date and Time, File, Options or Numeric. Data fields can be associated with the items that appear it the same condition as the data field. For more information on this, see Lineage tracking and linking data below.
The default for each column added to the smart table, whether it is an inventory field or a data field, is for the field to be a variable. This means that different conditions (or rows in the table) can contain different values for this field. This might not always be the case however, for example you may have an input reagent or sample which is used across different conditions. Or you may want a parameter that is constant for the whole experiment to appear in the table, so it can be exported along with the other experimental data. In such cases, you can use the variable toggle switch to change the field to a constant. Fields which are constants will be the same for every condition in the experiment.
Multiple smart tables can be created in an experiment but the conditions will be the same for all tables. For example, condition 1 in a table at the beginning of the experiment detailing the samples that are being analysed, will be associated with condition 1 in a table further down the experiment, where data is inputed.
Where a condition (row) in a smart table has both input and output items, these items will be linked through lineage tracking, with the input item being the parent and the output item becoming the child. Likewise, a data field will be linked with the items in the same condition. Note items are only linked with other items and data fields that appear in the same condition as them. An item will not be linked with data or items that appear in different rows of the table. See more about lineage tracking and linking data here: Connecting your inventory to experiments
Configuration pane - you can access this for any column by clicking on the column header. You can also hide a column by clicking on its header.
Export - Export the data in your table to XLSX or CSV format by right-clicking and choosing export.
Quick data entry - use copy and paste actions or fill multiple cells at once by selecting the lower right-hand corner of a cell and dragging data to other cells.
