The Sequence editor is an intuitive tool designed to efficiently edit and visualise genetic sequences within your workspace, including DNA sequences, plasmids and primers. Link your designs to your inventory and entries or keep a shared library of molecular designs with colleagues.
Plasmid design - upload, edit, analyse and annotate all elements of your plasmids including primer binding sites.
ORFs and protein translations - translate DNA sequences directly to amino acid sequences.
Import and export sequences. Import *.gb, *.gbk *.fa files or export sequences as a Genebank, Fastq or Teselagen JSON file.
Save DNA and AA sequence libraries - sequences can be used and referenced across all Labstep modules.
Enzyme library - select enzymes from a standard library or add your own enzyme designs.
Virtual digest - view enzyme cut-sites and generate virtual digest details such as fragment length and overhang.
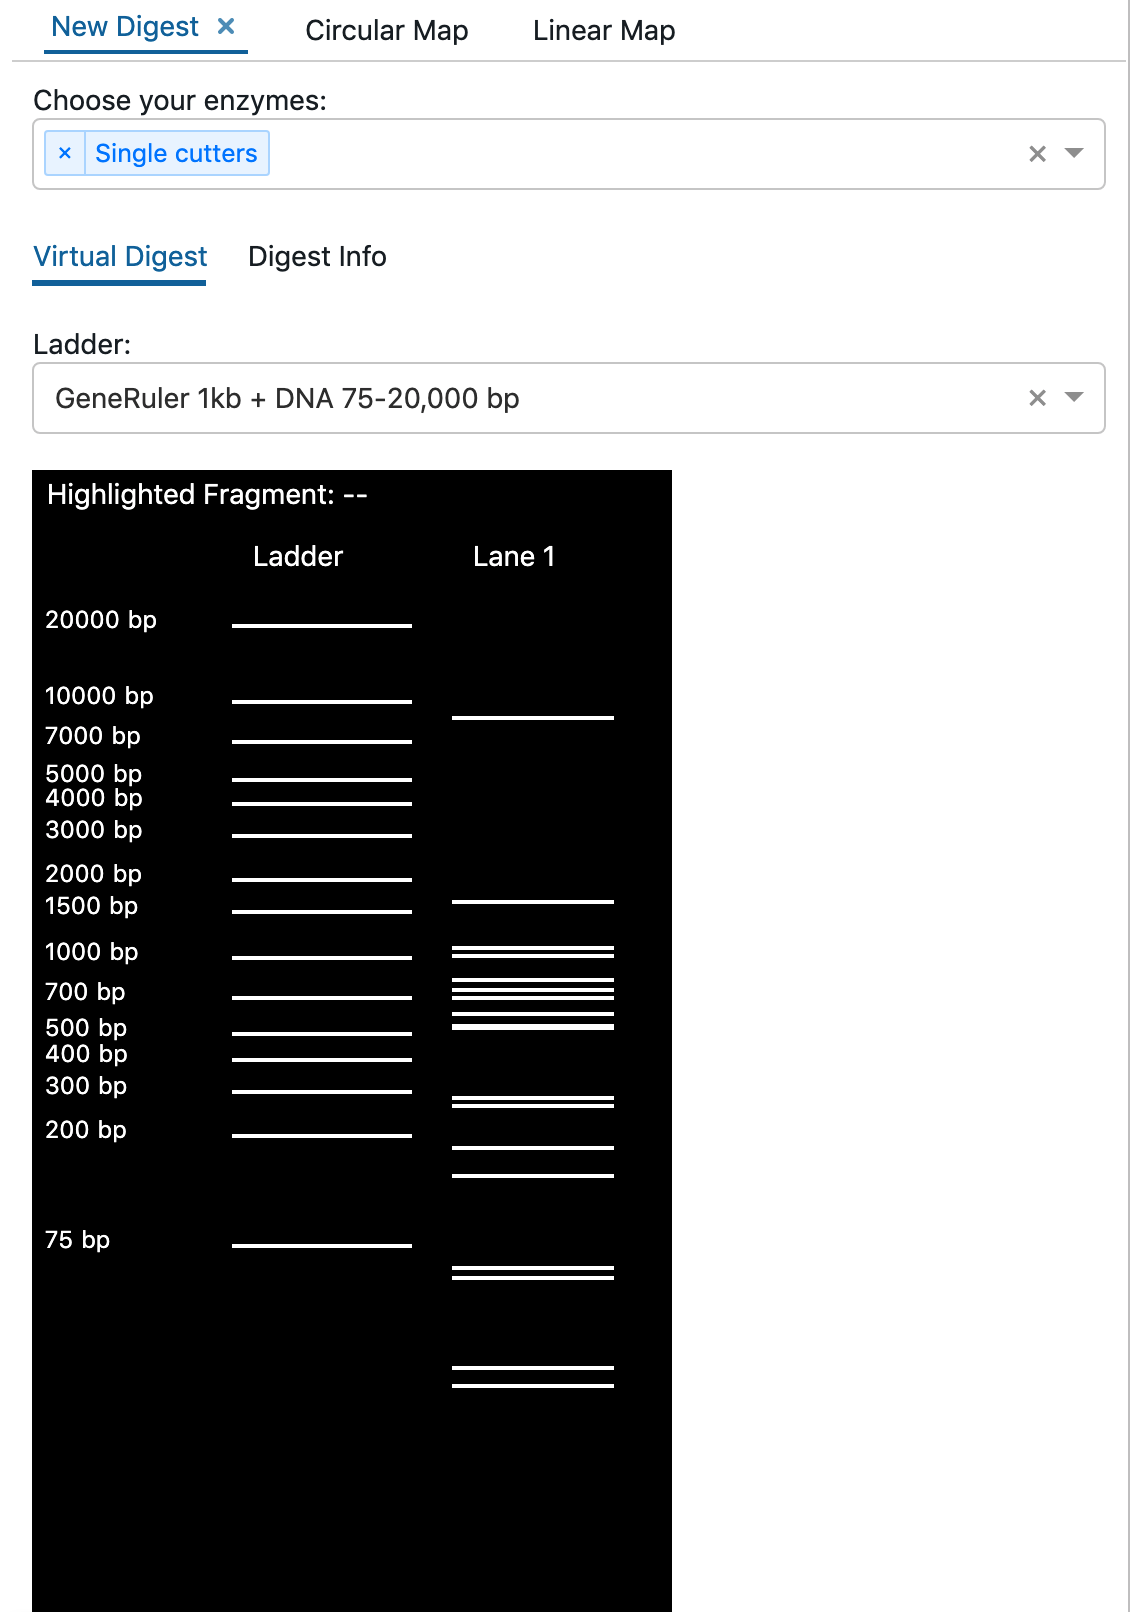
Visual gel digest - visualise resulting size of DNA fragments in a virtual gel.
Navigate to an experiment or protocol entry of your choice
Type / (slash)
Select Data
Specify whether it is 'Input' or 'Output'
Select the Data type to Sequence
Specify any other additional metadata
Click on 'Create sequence'
Click on the blue arrow on the left-hand corner to expand to full screen
Add the necessary information, click on 'Done' when you're finished
Open the Sequence editor in full screen
Click on 'File' in the far left-hand top corner of your screen
Click on 'Import Sequence'
Select a file
That's it!
Labstep team tip: The Sequence editor supports the following file format for imported sequence .gb, .gbk, .ape, JSON and FASTA. Please note if you import another type of file, the Sequence editor won't be able to properly recognise and open the genetic map.

GenBank File → can be viewed using programmes such as SnapGene Viewer and Snapgene. The annotation section starts with 'LOCUS', the sequence section starts with 'ORIGIN' and it ends with '//'.
FASTA format → can be downloaded and opened with Jalview or Genome Compiler for both Mac OS X and Windows. It can be copied directly into a genome browser such as Ensembl.
JavaScript Object Notation format (JSON) → can be opened with Microsoft WordPad/Notepad, or Apple Text Edit on MacBook.
Open the Sequence editor in full screen
Click on 'File' in the far left-hand top corner of your screen
Click on 'Export Sequence'
Select a file format
That's it!
After you have created a sequence data entry point → you can directly copy/paste a sequence or enter a custom sequence manually in the Sequence Map entry.
When the sequence has been entered → you will be able to view the Circular/Linear Map on the left-hand side of the screen and detailed features of the sequence on the right-hand side of the screen.
At the bottom of the page → you will be able to change your sequence type (circular or linear), which will be instantly mirrored on your genetic map.
When the sequence is entered → DNA cut sites, promoter regions, open reading frames and primer regions will automatically be outlined.
Labstep team tip: You can change the view and the nature of the sequence to linear or circular. Please make sure, both of these are the set the same to avoid confusion by viewing a circular sequence on a linear map and vice-versa. In the GIF below, you can find examples of circular (pUC18 plasmid) and linear (ACTN3 exon 1) DNA sequences.
File → rename, save, read-only, import, export, print, properties
Edit → create, cut, copy, paste, undo, redo, find, go to, select, change case, complement selection, complement entire sequence, reverse selection, reverse entire sequence, rotate to caret position
View → show all, hide all, features, translations, primers, parts, cut sites, ORFs, sequence case, full sequence translation, axis, axis numbers, reverse sequence, DNA colors, feature labels, part labels, cut site labels, external labels, label line, label line intensity
Tools → add additional enzymes, simulate digestion, remove duplicates
Help → searches through the toolbar menu
Save → saves a sequence
Export → downloads a sequence to your device
Import → imports a sequence to the Sequence editor
Undo → reverses a change
Redo → reapplies a change that had previously been deleted
Hide cut sites → enables you to filter through which cut sites you want to display
Hide features → enables you to show/hide features
Hide primers → enables you to show/hide primers
Open reading frame → shows ORF Translations and shows GTG and CTG as start Codons
Switch to read only → prevents any editing
Find → enables you to search through the sequence
Visibility → enables you to select what you want to see

Add a plasmid editor widget and you can start to load a sequence and see the features in real time. All the features will be loaded automatically and the sequence can be changed on the right side of the panel.
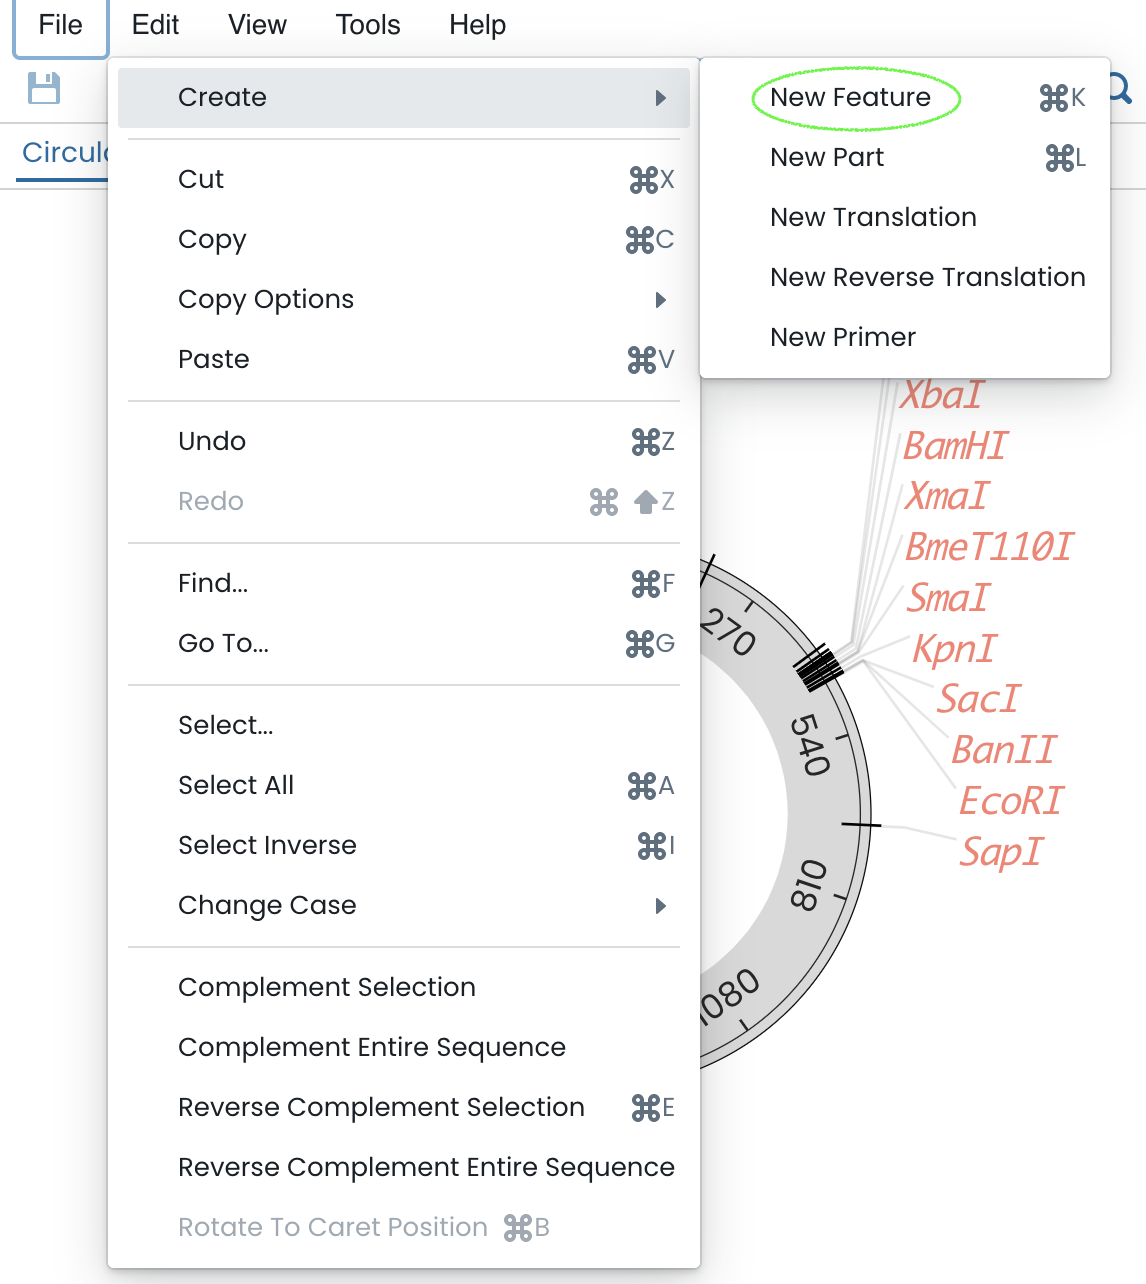
Accessing the “edit” tab allows you to create new elements for your sequence. Here you can add and sort more than 80 types of features and parts such as 5’/3’ untranslated regions, genes, attenuator sequences, conserved regions or transposons. They can be named, they will appear on both your genetic map and the detailed sequence overview.
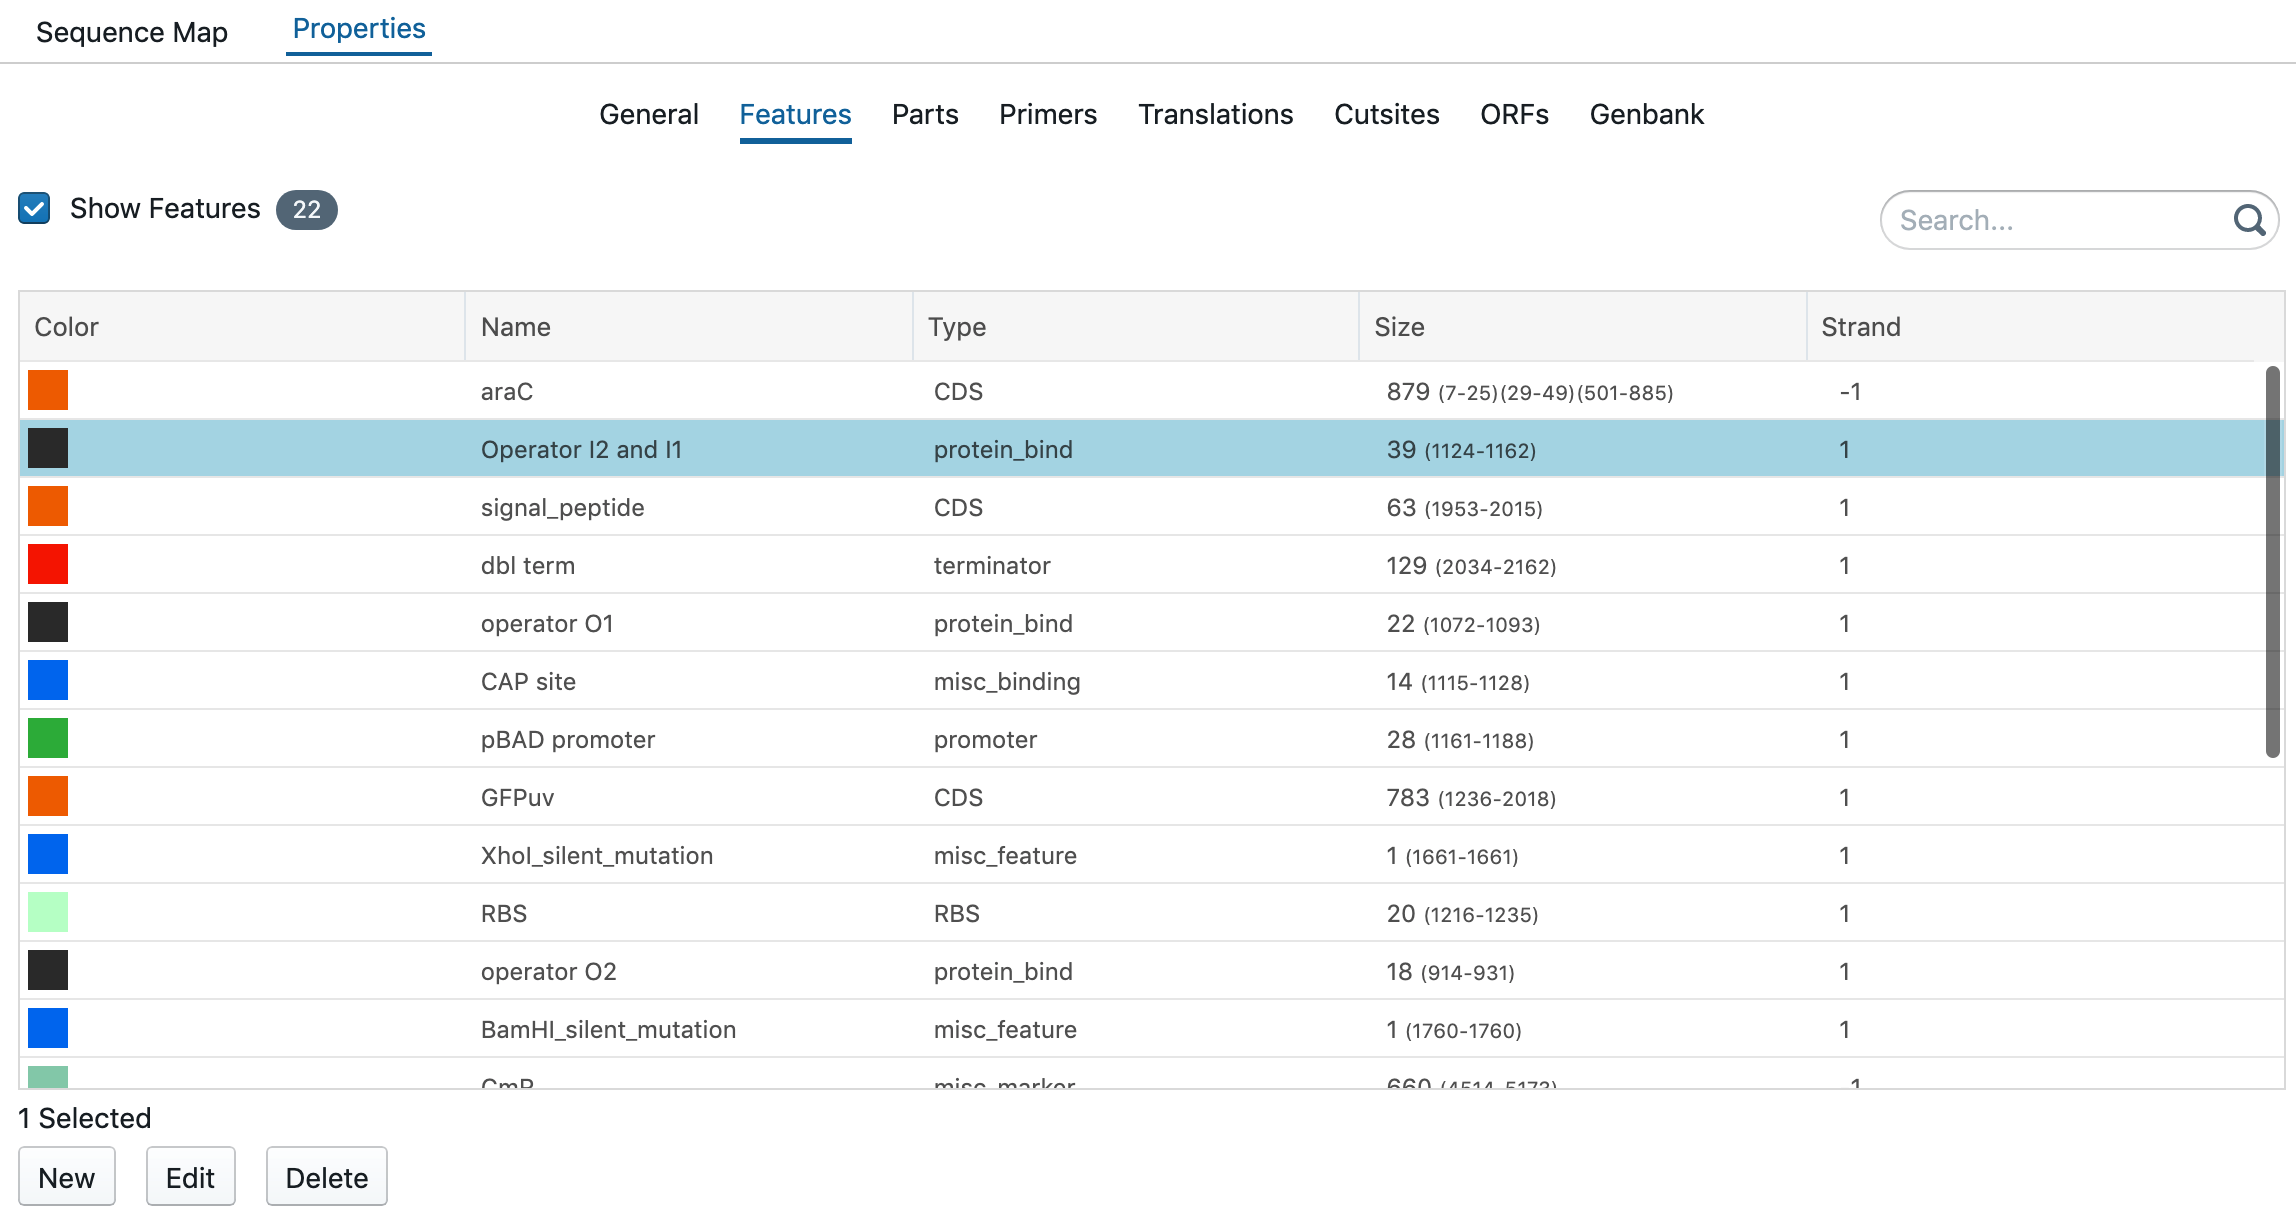
All features are summarized in the tab of Features. You have the option to change the color, name, type, strand. Select a sequence and right click to change, delete or create a feature. To reach this:
Click on 'Properties' on the right-hand side panel
Click on 'Features'
Select a feature
Labstep team tip: Clicking on 'New' will create a new feature, 'Edit' will edit the current selected feature and 'Delete' will remove it.
Through the edit tab you can also translate your entire sequence. The translated sequence will be mirrored on the right-hand screen and will also include the corresponding amino acids (see image below).

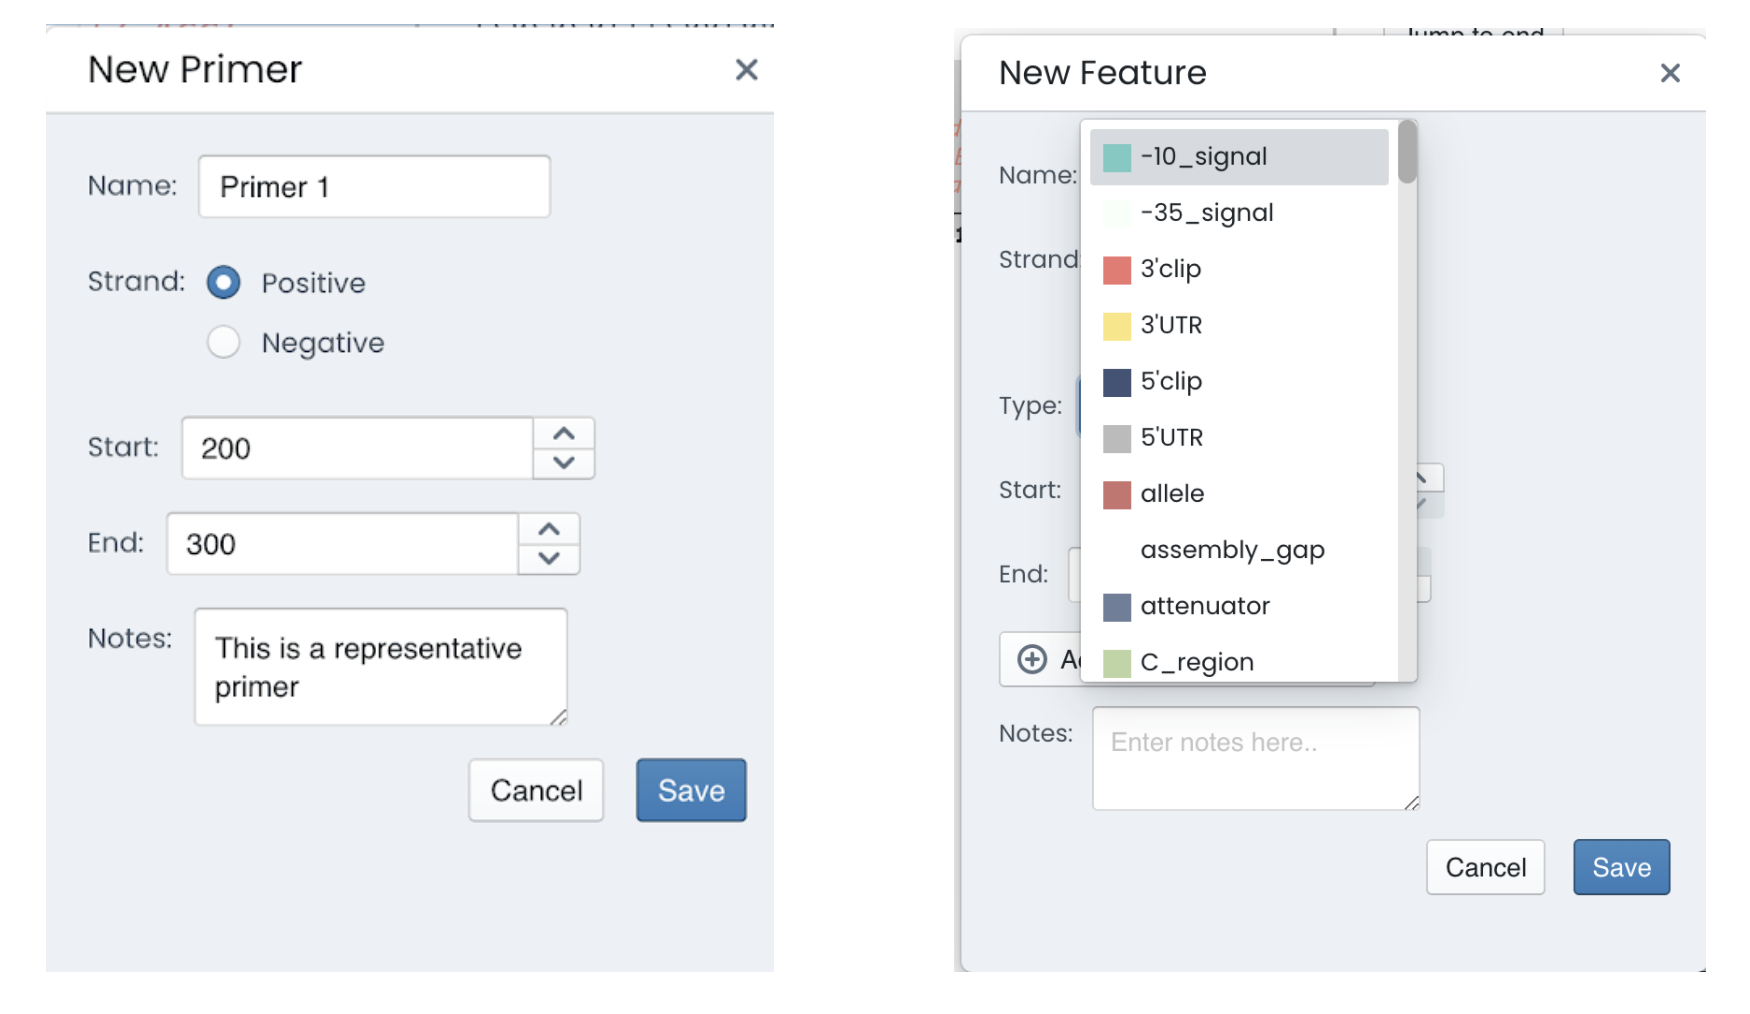
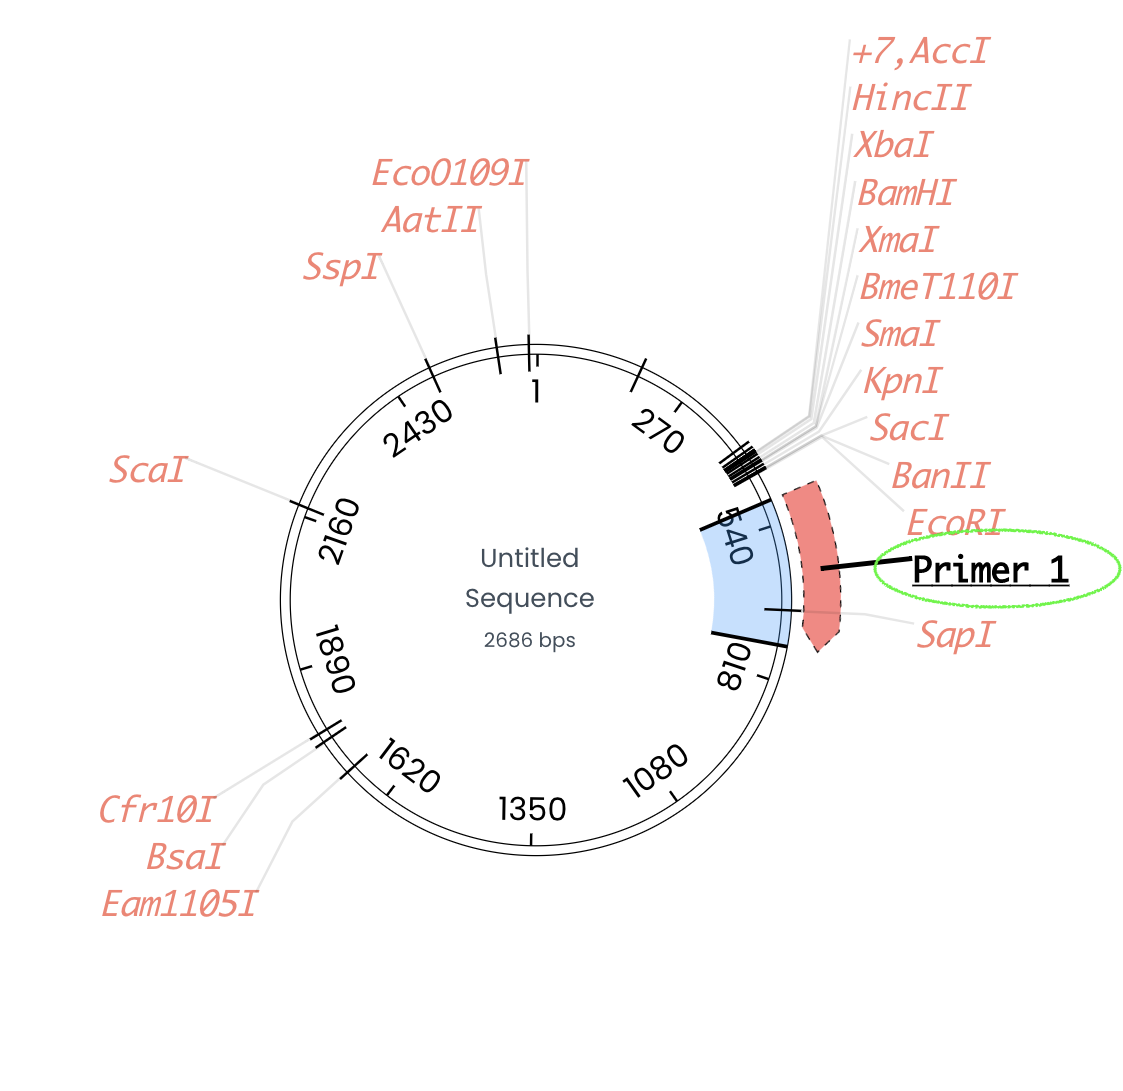
Additionally, the edit tab allows you to create a new primer by simply introducing the start and end region for the primer.
The primer will be present on your genetic map as an arrow.
The 'Tools' tab allows users to virtually simulate an enzyme digestion using enzymes that match the DNA cut sites identified within the genetic sequence.
To use this feature:
Click on 'Tools' tab
Select 'Simulate digestion'
Labstep team tip: You can also add more enzymes into your digestion simulations using the built-in enzyme libraries, or, if the enzyme is not yet in the database, create a new enzyme by recognition sequence.
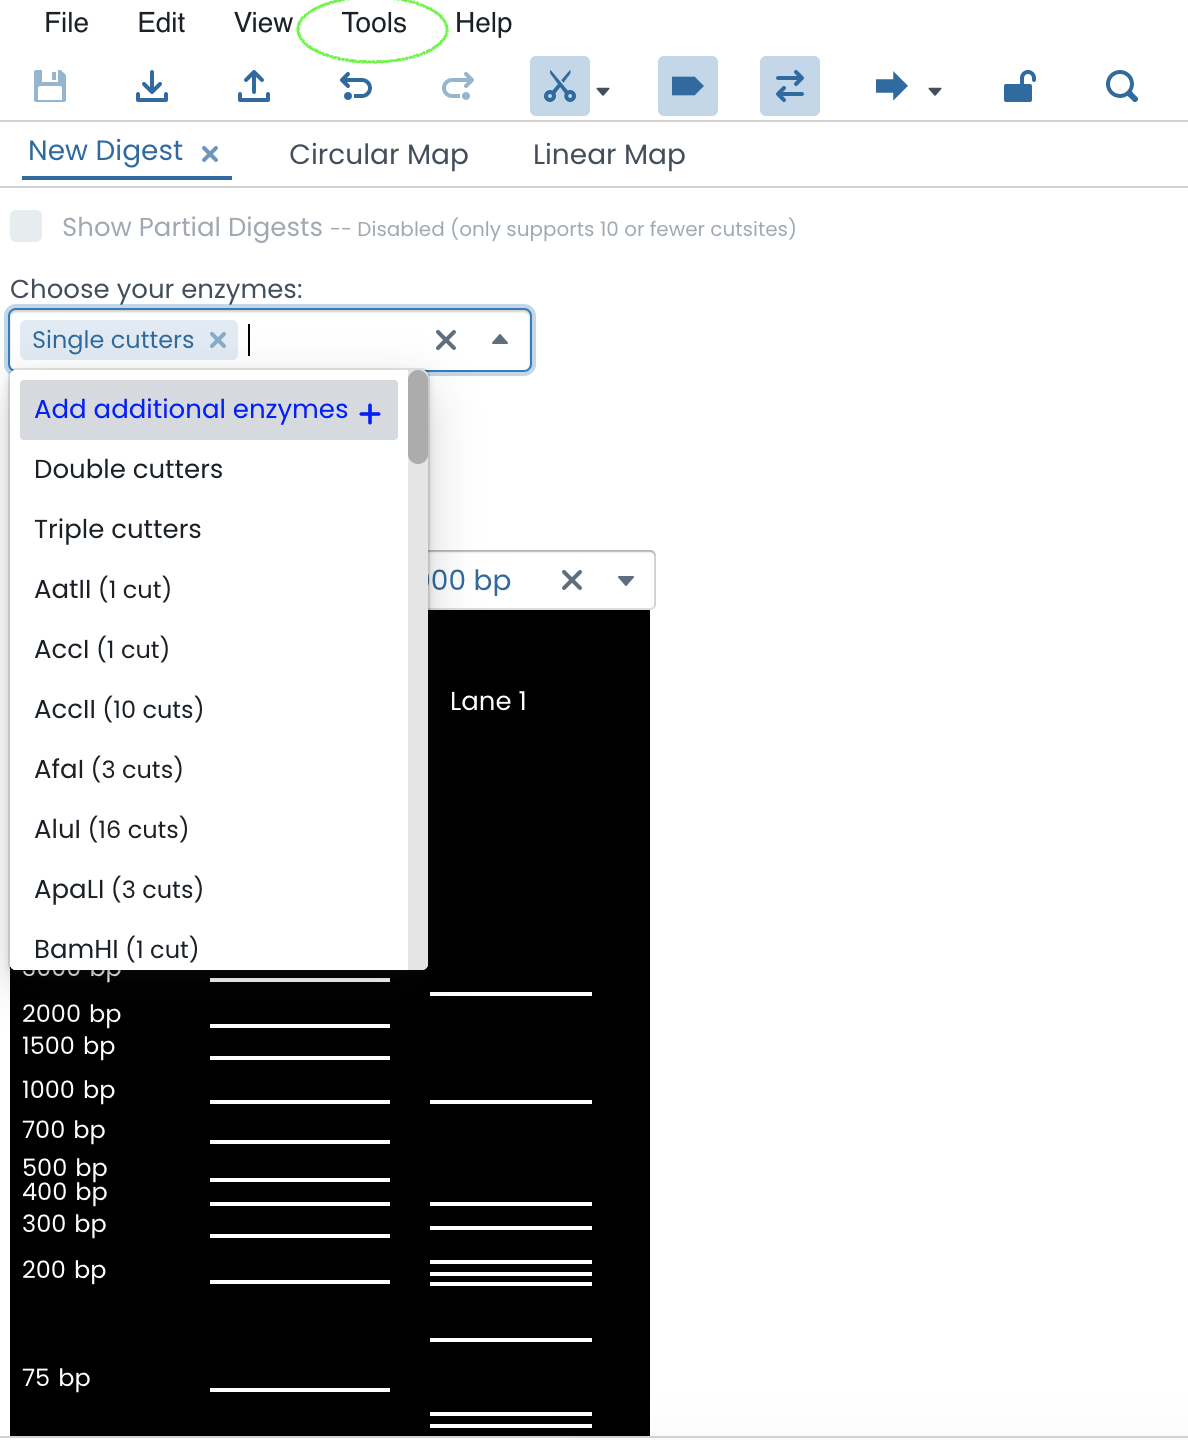
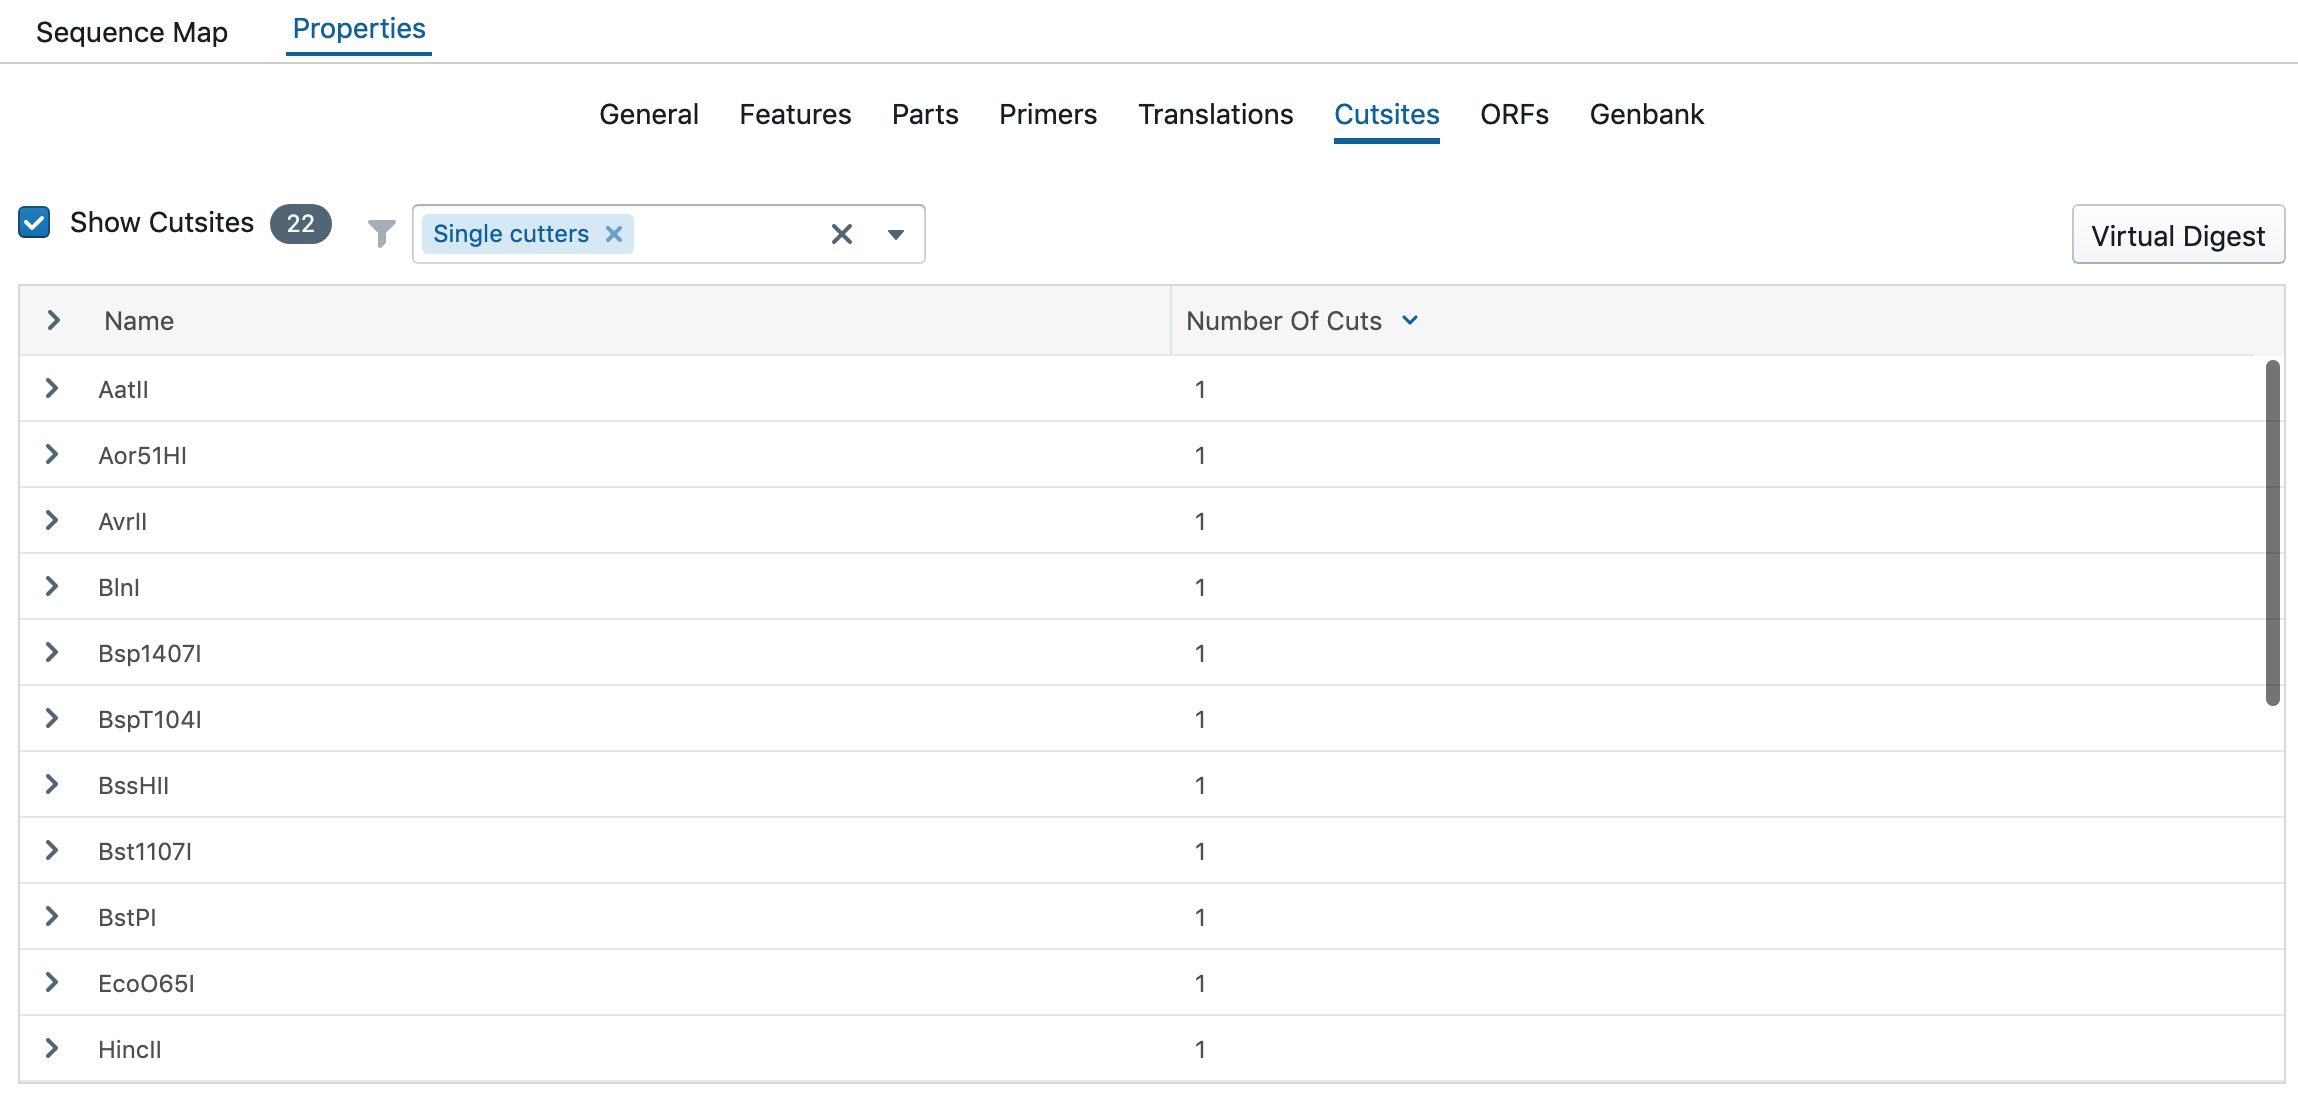
All cut sites will be listed under cut sites.
The size of the DNA fragment can be viewed at the virtual digest.
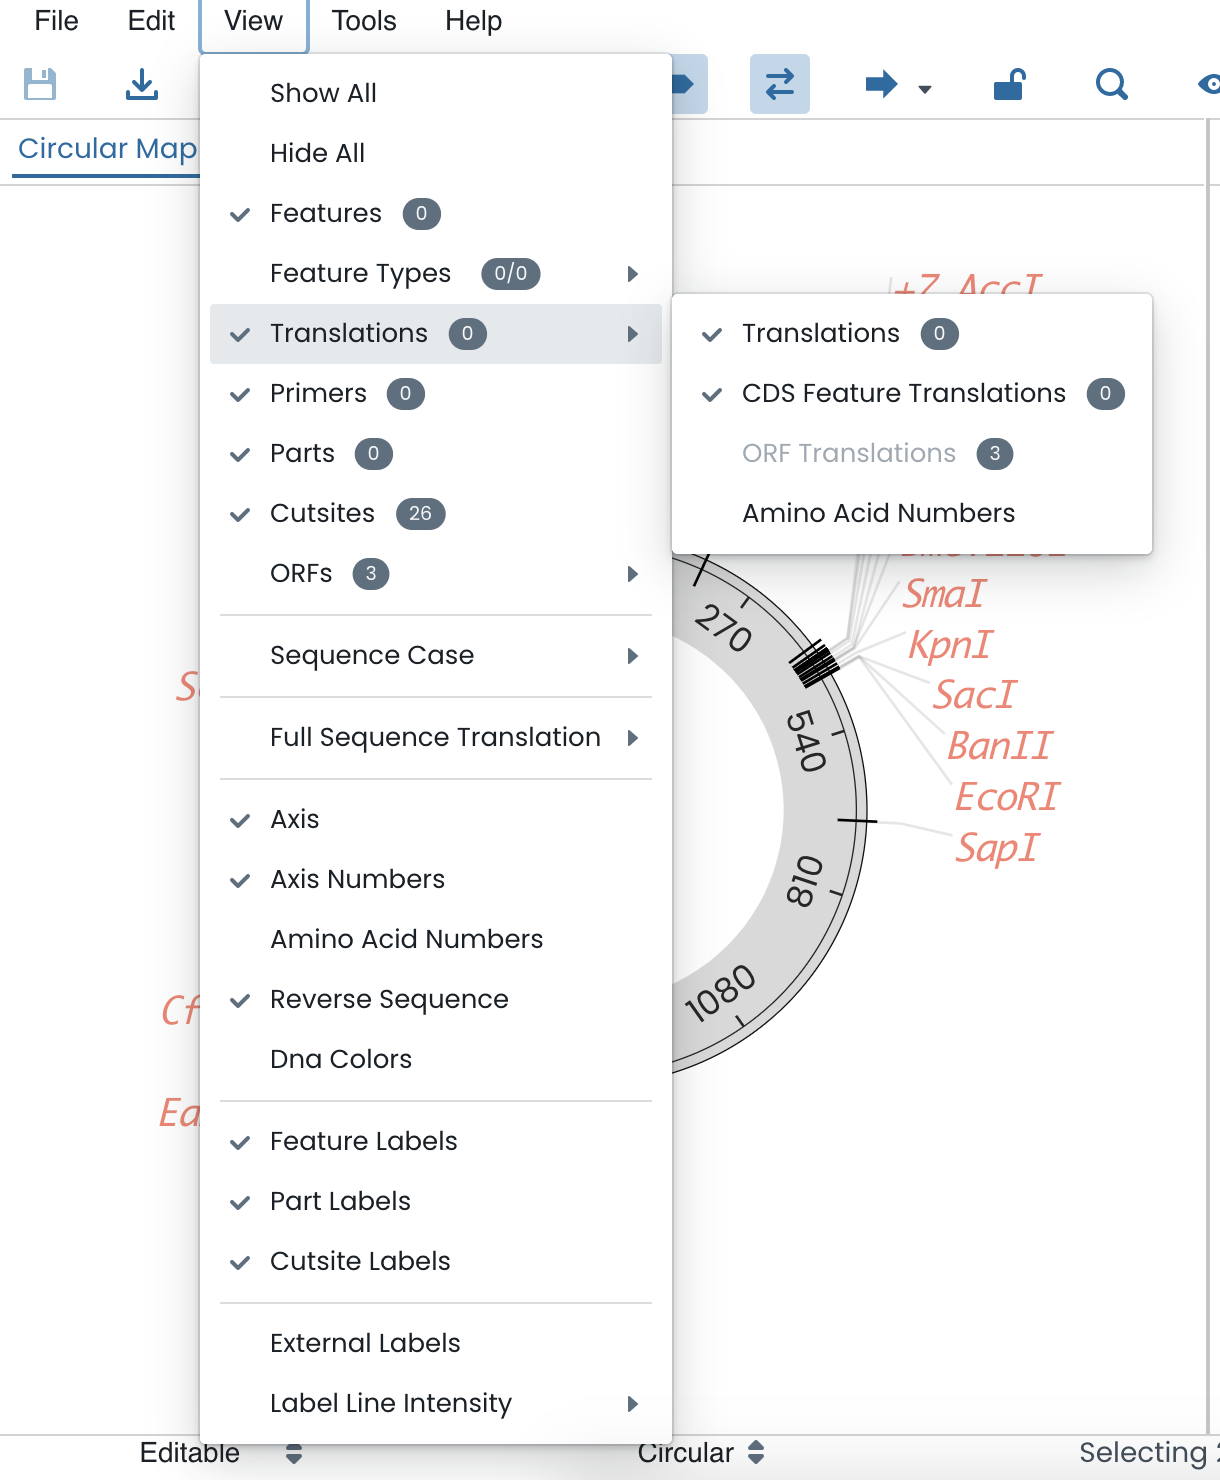
Clicking the view tab will present you with a variety of customisable features which you can use to detail and personalise your sequence view. Given that you have added features, parts and primers to your sequence as demonstrated in previous steps, you will now be able to decide whether you would like these to be included in your genetic map. By ticking the specific characteristics in the “view” tab, you can control what appears on your map.
The view tab will allow you to:
Show/hide features, translations, primers, parts, cut-sites and ORFs. If hidden, these will be not shown on both the circular/linear map and the sequence map
Show/hide axis and axis numbers. This will remove the indicative axis and bp numbers from both the circular/linear map and the sequence map
Show/hide amino acid numbers that indicate every 10th amino acid in the code. This can only be accessed after the sequence or a portion of a sequence has been translated and selected
Show/hide reverse sequence, feature labels and colour code nucleotide bases
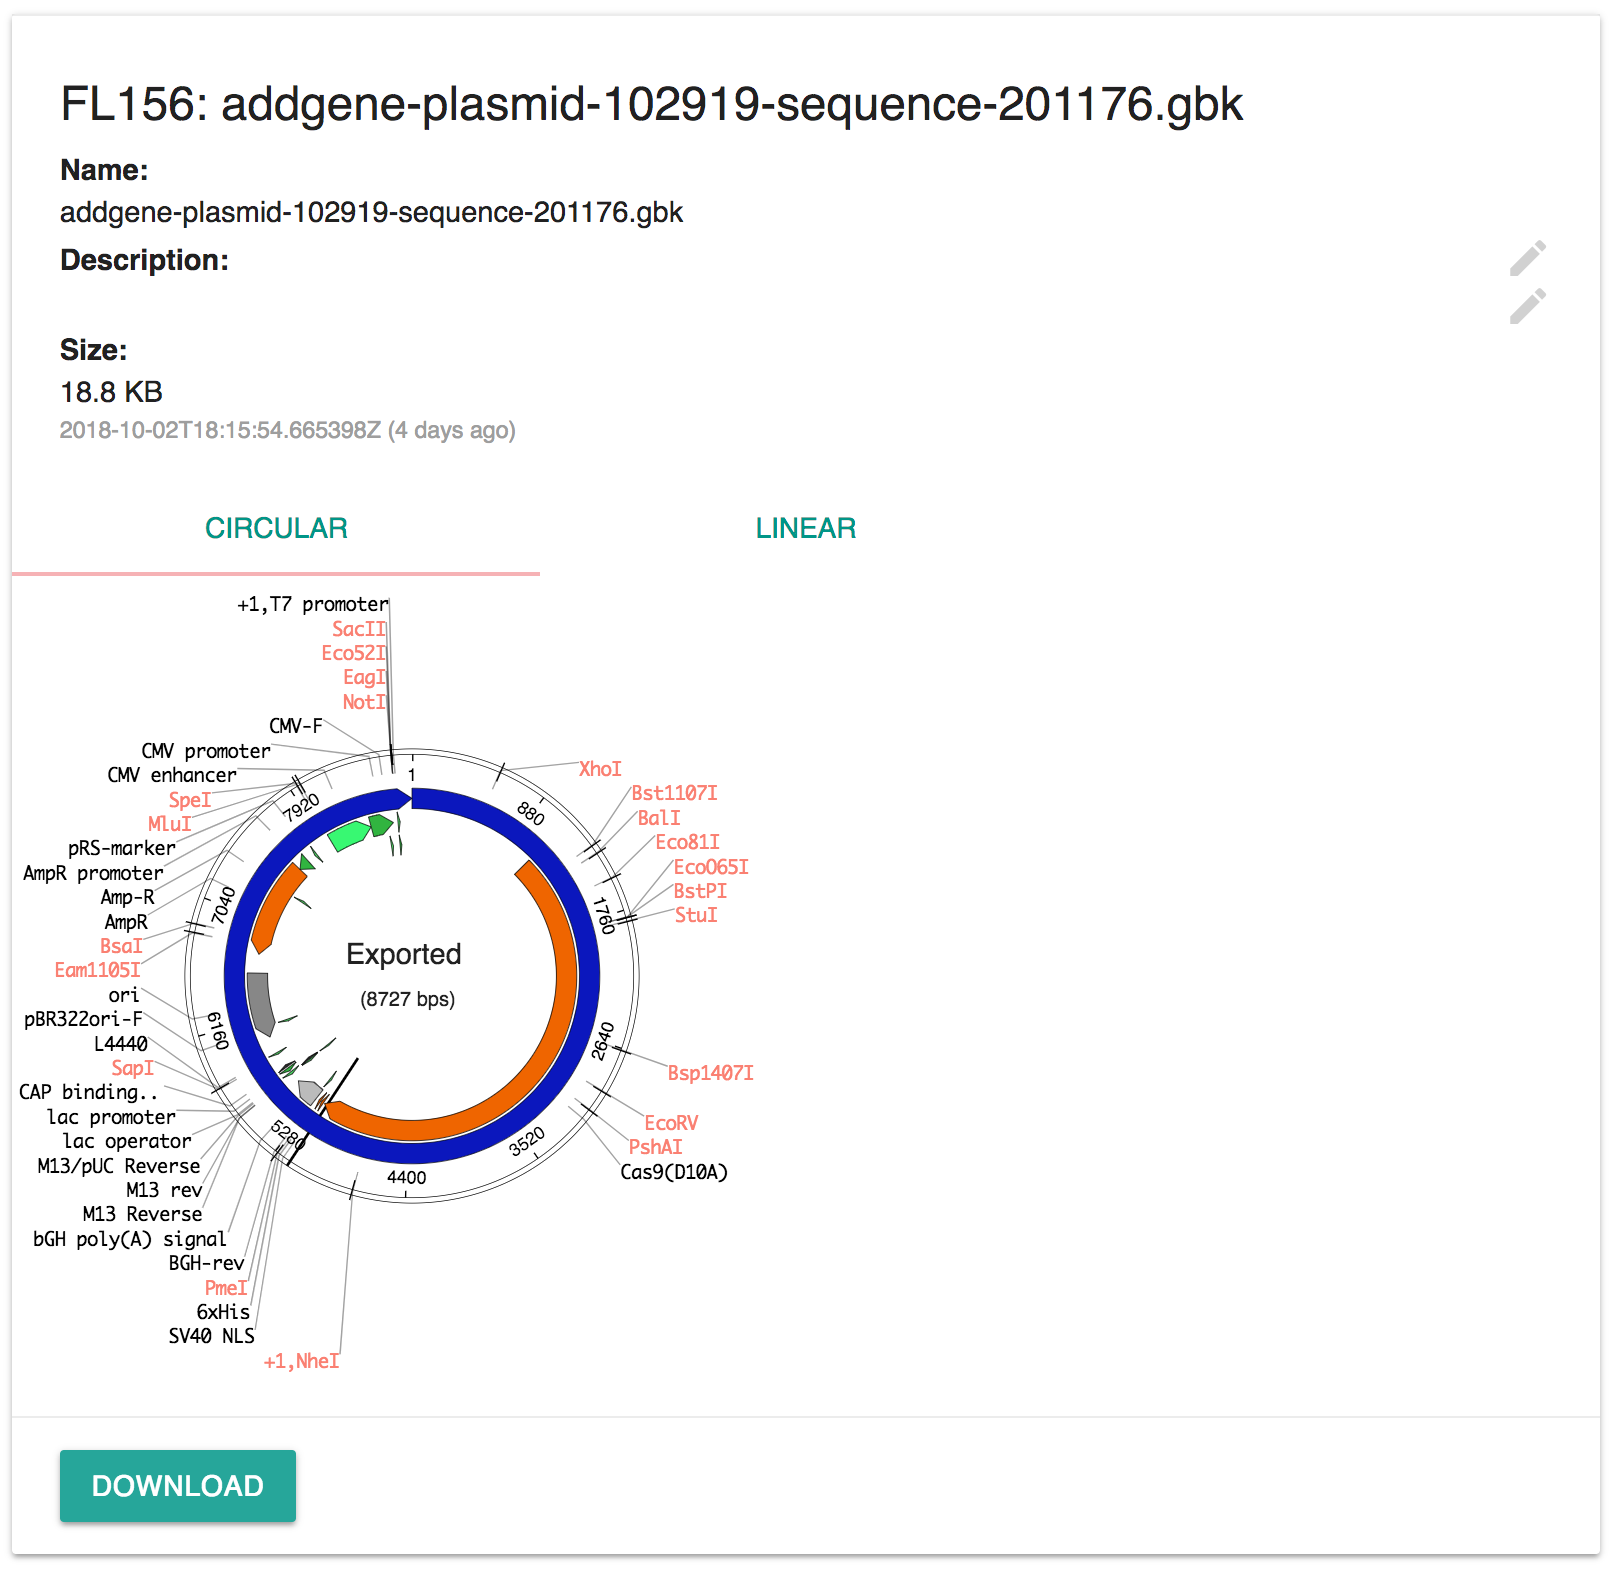
Use this widget to display the map of a .gb file in circular or linear format.
To view the map, upload a file (.gb, .gbk, .ape) and the plasmid will show automatically.
Still need help?
Contact us here or start a conversation with a member of our team using our in-app chat.
