Research and Development is an ever changing and complex field. Accordingly, Labstep is designed to be flexible and there is not a one size fits all approach to organising your workspace and data. This said, we find many users seek guidance on how to first set up their organisation and workspace, which they can iterate on or vary to suits their requirements. If this is you, we’ve put this guide together to help you. This is just a starting point - our team is on hand to help and advise you as part of your onboarding!
All content on Labstep is accessed through Workspaces. Each workspace contains it’s own Experiments, Protocols, Inventory, Order Requests and Devices (although content can also be shared between workspaces - see more on sharing below). To access the content within a workspace users must join that workspace with a specific role which determines their permissions on the content within that workspace.
Generally, a workspace will be made up of all the users within a group or team. The users in the workspace will be people who work together and likely use the same lab space, protocols and perhaps resources. For example, the workspaces within an organisation may have names such as:
The Assay Development Group
The Molecular Biology Team
The Bennet Lab
It is not common practice to use a single workspace per user or per project and in most cases this not an advisable approach.
Sometimes individual workspaces may be used for a specific purpose. For example, a communal inventory or devices repository, the contents of which may be shared into other workspaces that are used by R&D teams.
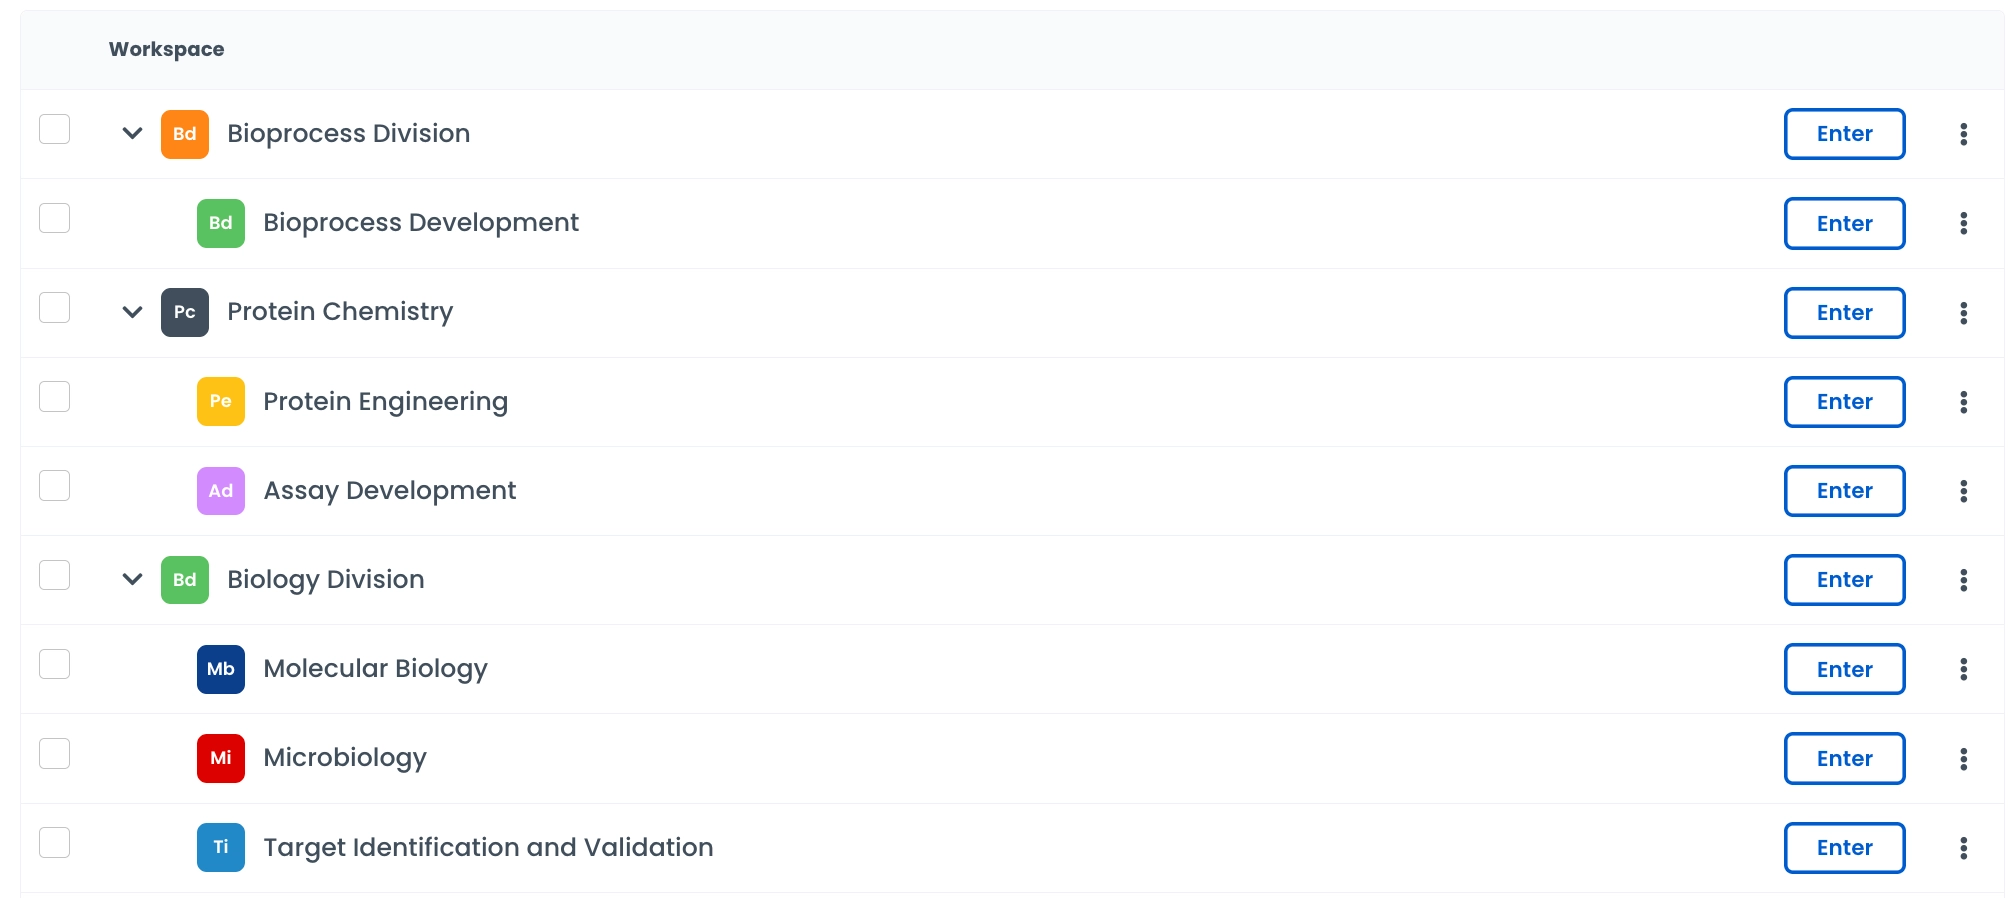
Nested workspaces can be used to create more structure in your organisation. For example, in your organisation you may have the Biology Division, under which the Molecular Biology and Microbiology teams sit. The Biology Division can be a top-level workspace with the two others sitting as sub-workspaces beneath this. This can be beneficial in large organisations with a multiple workspaces, creating a cleaner and easier to navigate workspace structure.
Every workspace must have at least one owner, but it can have multiple.
The workspace owner is often a lead researcher within the group who will be responsible for adding new colleagues to the shared workspace, unlocking experiments and setting workspace members permissions
Workspaces have three out-the-box user roles - Owner, Editor and Viewer, which cover broad, general use cases. In addition, there is the option to create custom roles to suit your needs. Some example of the type of roles that may be useful:
A general user role in which users can view and edit only their own experiments, this keeps the experiment entries of each user in the workspace personal to them.
An intern role with greater restrictions on what can be edited, E.g. new protocol versions can be drafted but not set live, new tags cannot be created but can be assigned, devices can be booked but not edited or created.
An approver role that can set new protocols live, lock and sign experiments but does not have the full control of the workspace that the owner has.
The Protocols module is for any repeatable method or SOP you do in the lab.
Protocols can also act as interactive data collection forms to ensure users collect data in the correct format.
Add inventory fields to capture which samples and reagents were used. Add data fields to capture important parameters or results. Using these structured elements not only enforces consistency in data collection but also allows you to easily compare key parameters and results across all your experiments in the reporting module.
Versioning of protocols allows you to update your protocols, whilst maintaining a record of the previous versions executed as part of experiments. It would usually always be recommended to create new versions of protocols, when they are updated, rather than creating a entirely new protocols.
The Experiments module is for your experimental write ups.
Experiment Templates are a great way to reduce labour for the user and encourage consistent data collection. Templates can be used, for example, to:
Define a format for all experiment write ups, such as providing headers for Introduction, Methods, Results, Analysis and Discussion.
Set out standard workflows, for example a series of protocols commonly used together in a workflow.
Choose a status workflow for the template, so that each experiment must progress through a series of stages with, with assigned roles and signature requirements.
When first setting up a workspace, it can be useful to pick a selection of 3-5 types of experiments that regularly are executed in your lab and create an experiment template for each of these. This can help provide all users a starting point and help set the standard for data capturing in the workspace.
Using interactive components in your experiments can be really helpful for structuring your data and enabling future analysis or review. E.g. using data fields, inventory fields, protocols and smart tables.
Collections are used to organise both Protocols and Experiments.
Collections are generally used to organise Experiments and Protocols in projects.
In general, it is not recommended to use collections for any function that is covered by built in functionality in Labstep, as the built-in functionality already provides a swift, convenient route, often with the relevant data auto-captured. This removes burden on the user to manually organise the workspace. For example:
Instead of a collection for each user in the workspace —> filter experiments by the auto generated ‘created by’ parameter, or where relevant, the ‘assigned to’ parameter.
Instead of collections for each status —> use the built in experiment statuses, status workflow and draft/live filters.
Instead of collections for dates e.g. ‘HPLC runs 2026’ —> filter by Created/Start/Completion date using the built in filters.
Users can be assigned to whole collections, so with the permissions system, who can view and edit all entries within a collection can be controlled on a user-to-user basis.
Inventory in Labstep exists in a hierarchy of Categories, Resources and Items. Items are always associated with a Resource. Resources should also always reside in a category. Both resources and items can have metadata associated with them.
When creating categories it is advisable to always set up a template for both the resources and the items in the category. This way, resources and items are automatically created with the relevant metadata fields, reducing both the burden on the user to create these and the potential for them to be missed.
It is recommended to spend some time considering how to structure your inventory and, for each category in your inventory, what metadata you might have for the items and resources. Below are a few examples of how some different categories could be structured:
Category | Example resources | Example resource metadata | Example items | Example item metadata |
Cell Lines | • HEK293 | • Source | • LN2 storage aliquots | • Freezing date. |
Bacterial strains | • DH5alpha | • Source | • Freezer aliquots | • Freezing date. |
Plasmids | • Puc19 | • Plasmid backbone | • Prepped aliquots | • Barcode |
Primers | • 27f | • Sequence | • Lyophilised storage | • Concentration |
Reagents | • PBS buffer | • Supplier | • Bottles of reagents bought in or prepped in house | • Date of prep |
Chemicals | • Acetone | • CAS number | • Bottles | • Arrival date |
Media | • Terrific broth | • Supplier | • Bottles of media bought in or prepped in-house | • Date of prep |
It is common for some content to be shared between multiple workspaces. For example particular protocols that are used by multiple teams or devices that are shared.
Content can be shared between workspaces on Labstep in two ways:
You can share individual protocols, experiments, devices etc with another workspace via the ‘Share’ action.
You can set up ‘Auto-sharing Rules’ for example to automatically share all protocols from one workspace to another.
